Base is Coinbase’s Layer 2 blockchain built on the Optimism stack, designed to bring the next billion users on-chain. Because it’s backed by one of the largest crypto exchanges and tightly integrated with the Coinbase ecosystem, the possibility of an official Base airdrop has become one of the most anticipated in the crypto space.
While there’s no confirmed airdrop yet, Base has already hinted at rewarding early adopters, creators, and builders who help grow the network. That means your on-chain activity today could pay off later if Base or related ecosystem projects choose to reward contributors.
👉 New to Base? You can Sign up on Coinbase to bridge easily and earn unique Base ecosystem badges along the way.
🧭 How to Potentially Qualify for the Base Airdrop
1️⃣ Trade on Base
Use Base-native DeFi protocols to show consistent activity. Start with Avantis Finance — a trading platform built on Base.
Swap, provide liquidity, or use any available trading features.
Interacting with multiple dApps can increase your eligibility if Base tracks ecosystem engagement.
2️⃣ Build on Base
If you’re a developer, deploying even a small contract on Base is a strong signal of contribution.
Use tools like Remix or Thirdweb to deploy a smart contract.
Participate in Base hackathons or open-source projects.
Complete any available quests or tasks linked to your name. These often become criteria in ecosystem reward programs.
Owning a .base name and completing the associated quests can serve as proof of engagement — and may be included in future reward criteria.
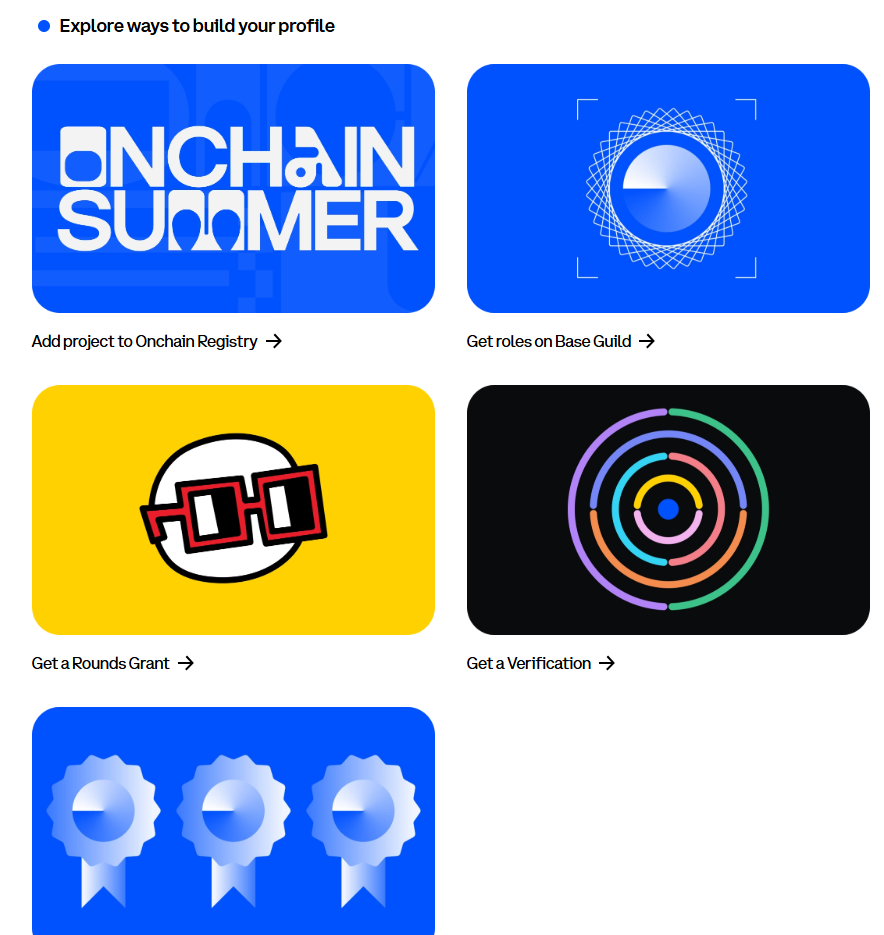
From there, you can build your profile and check your score. You can also get verified if you have a Coinbase account.
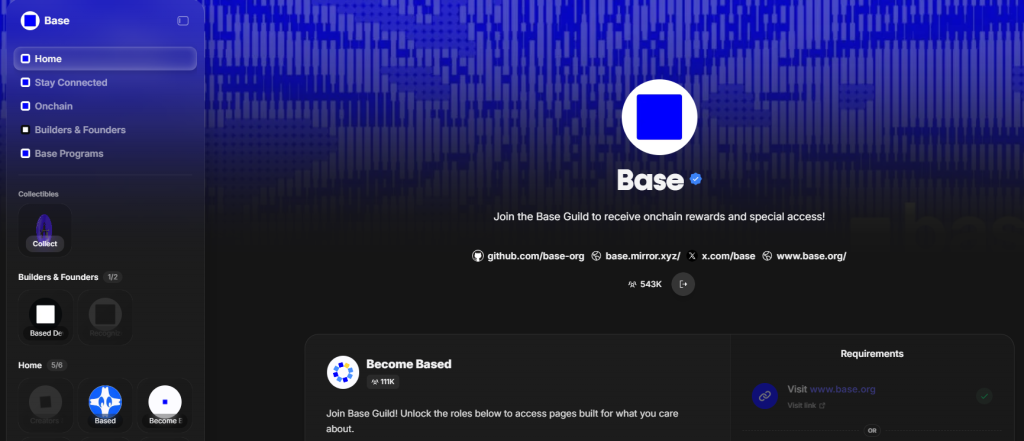
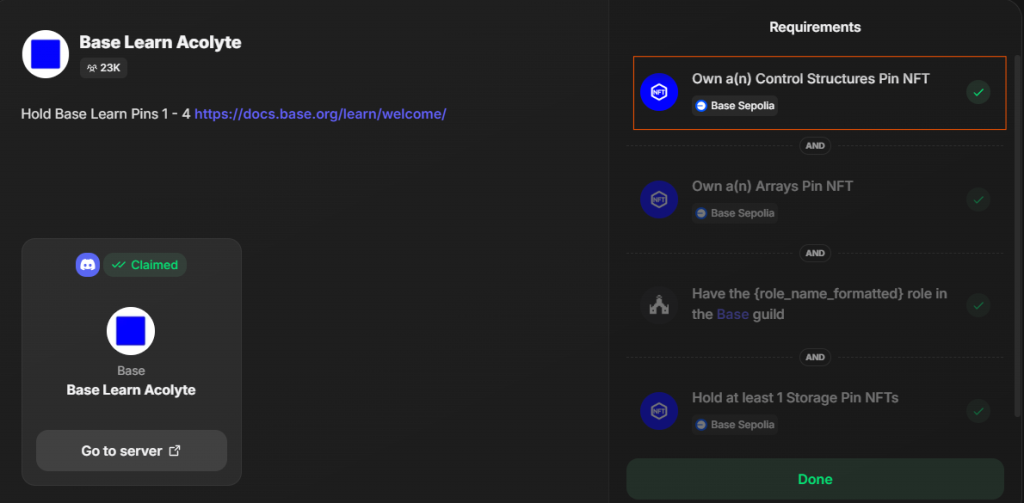
5️⃣ Join the Base Guild
Join the official Base Guild to access community roles and missions.
Connect your wallet and complete tasks (joining Discord, following Base on X, small on-chain actions, etc.).
Earning guild roles shows consistent engagement with the community.
Guild participation has historically been used to identify early supporters in other ecosystems.
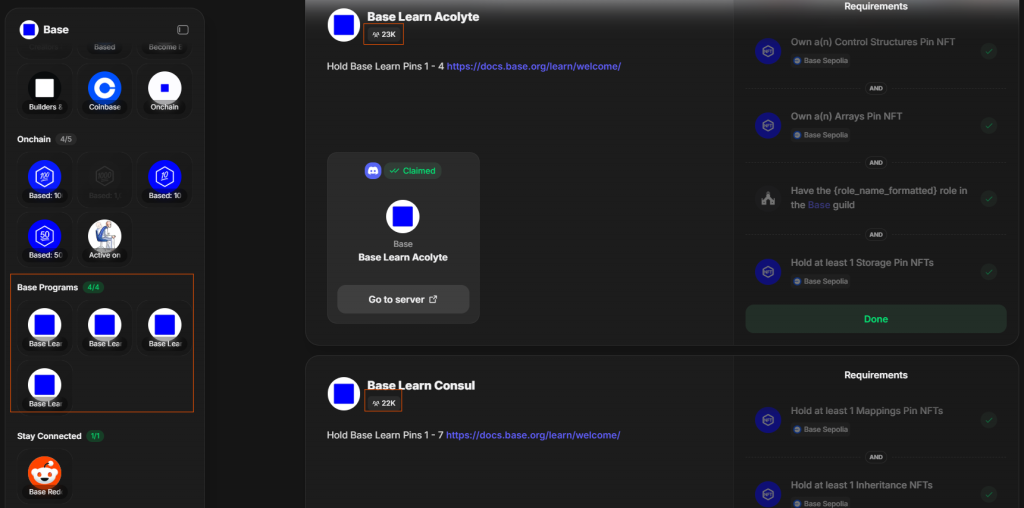
6️⃣ Collect Builder NFTs
Base has released several Builder NFTs that help identify early contributors. Owning these NFTs could set you apart from other users. The tasks to claim them are listed under “Base Programs”, and far fewer people have completed these compared with other onboarding tasks — so they may be especially valuable to pursue. Below is a step-by-step tutorial on how to claim them.
🧱 How to Claim Your Base Builder NFTs (Testnet Tutorial)
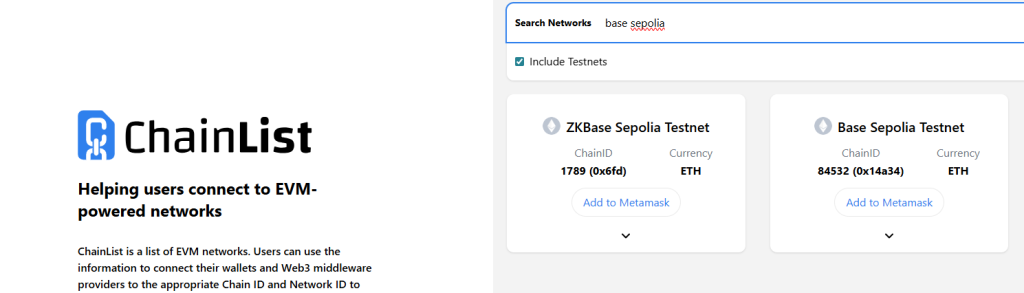
🔹 1. Set Up the Base Sepolia Network
Add the Base Sepolia network to your favorite supported wallet. You can easily add it to metamask through Chainlist.org.
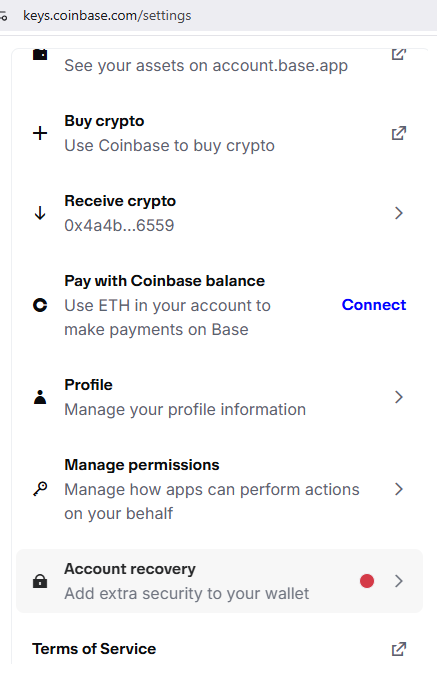
If you prefer, you can also create a Base universal wallet — here’s how:
5. Link both your main wallet and your Base universal account wallet to Guild for seamless progress tracking.
🔹 2. Get ETH on the Testnet
You’ll need a small amount of testnet ETH to deploy your contract. Visit the Base Faucetpage — it offers multiple ways to claim ETH.
If you’re using the Base universal account, your gas fees are often sponsored by Coinbase.
If you have a Coinbase account, you can log in and use their developer faucet.
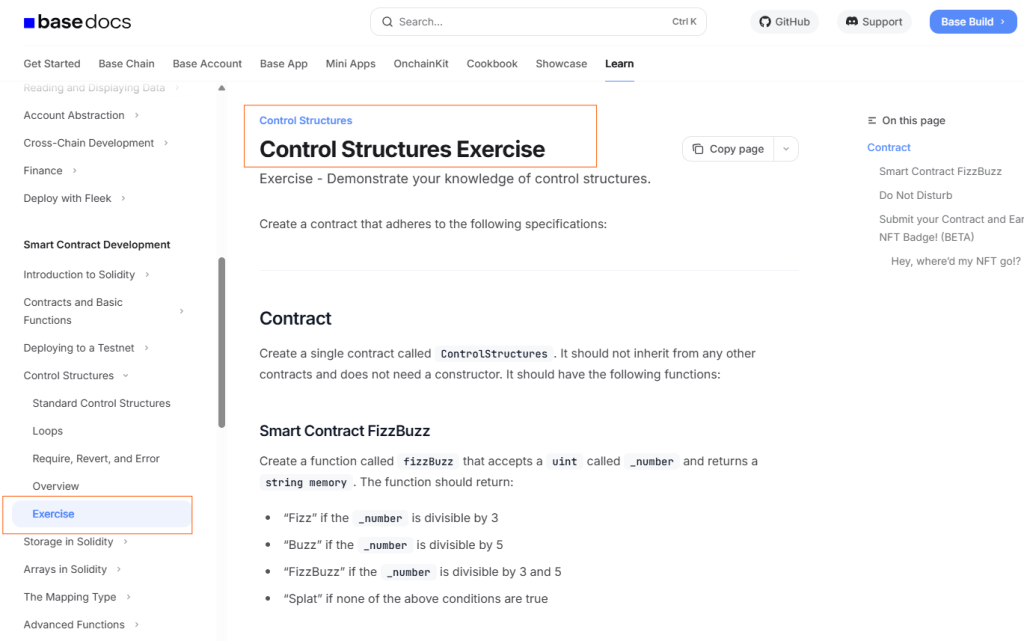
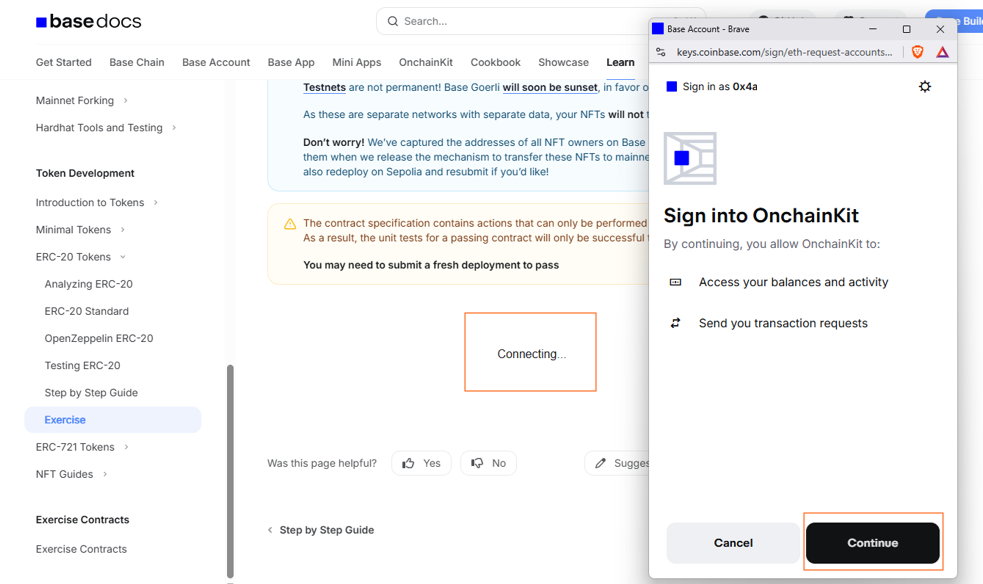
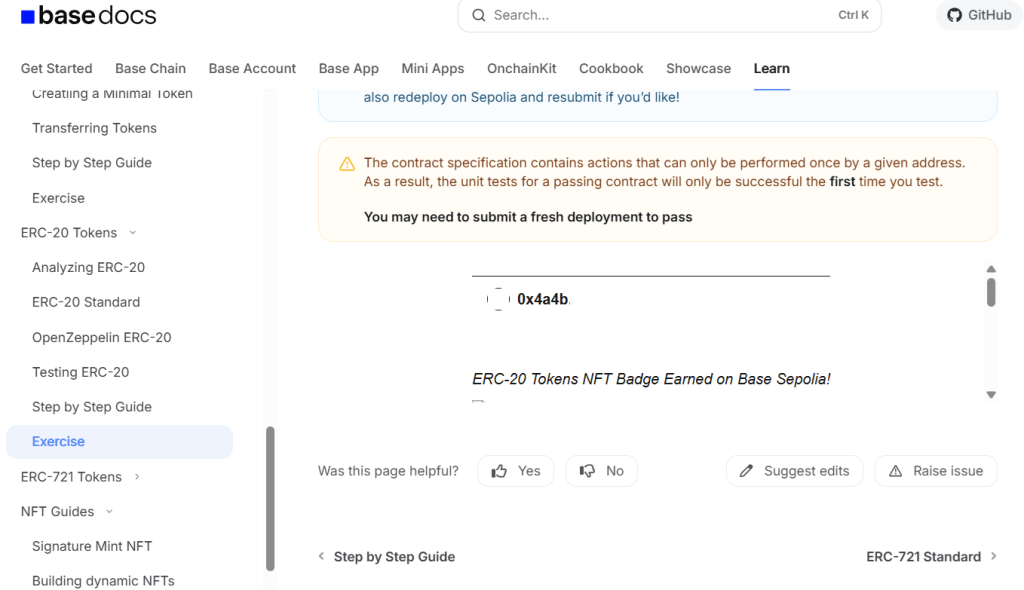
🔹 3. Locate the Builder Exercises
Head to the Base Learn portal. Each Builder task corresponds to an “Exercise” section within the learning module. Find the exercise that matches the task you’re working on — it’s typically under the Exercise tab of that module as seen below.
🔹 4. Write Your Solidity Code
Now, solve the exercise by writing the Solidity contract. Modern tools like AI can help accelerate your learning curve, but make sure you understand each line. ⚠️ Important: Never deploy test contracts from a wallet that holds real assets — always use a fresh or test wallet.
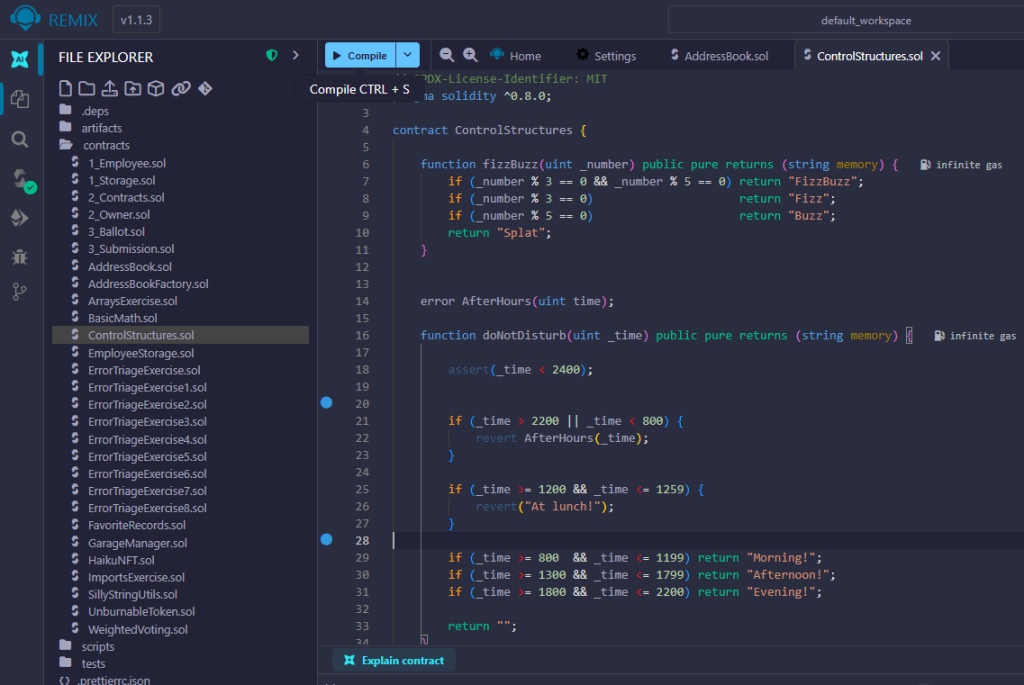
We will provide you with the code for the “Control Structures” exercise.
// SPDX-License-Identifier: MIT
pragma solidity ^0.8.0;

contract ControlStructures {

    function fizzBuzz(uint _number) public pure returns (string memory) {
        if (_number % 3 == 0 && _number % 5 == 0) return "FizzBuzz";
        if (_number % 3 == 0)                     return "Fizz";
        if (_number % 5 == 0)                     return "Buzz";
        return "Splat";
    }

    error AfterHours(uint time);

    function doNotDisturb(uint _time) public pure returns (string memory) {

        assert(_time < 2400);

        if (_time > 2200 || _time < 800) {
            revert AfterHours(_time);
        }

        if (_time >= 1200 && _time <= 1259) {
            revert("At lunch!");
        }

        if (_time >= 800  && _time <= 1199) return "Morning!";
        if (_time >= 1300 && _time <= 1799) return "Afternoon!";
        if (_time >= 1800 && _time <= 2200) return "Evening!";

        return "";
    }
}
🔹 5. Compile Your Code in Remix
Go to Remix IDE. Under the contracts folder, create a new file — for example, ControlStructures.sol. Paste your Solidity code, and make sure it compiles without errors.
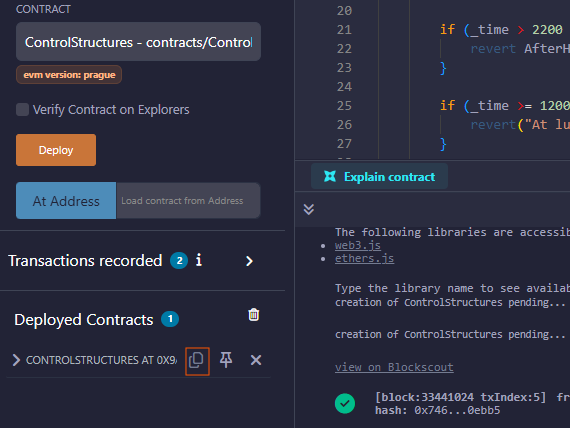
🔹 6. Deploy to Base Sepolia
Open Remix’s Deploy & Run tab. Connect your MetaMask or Base universal wallet to Remix. Select the Base Sepolia network, and deploy your contract. 👉 You can find more deployment guidance on Remix’s Base documentation page.
🔹 7. Find Your Contract Address
Once deployment is complete, scroll down to the Deployed Contracts section. Copy your contract address — you can then view it directly on BaseScan Sepolia.
🔹 8. Verify and Publish (Optional)
Optionally, you can verify and publish your contract on BaseScan. Not all exercises require verification, but doing so helps confirm your work publicly on-chain.
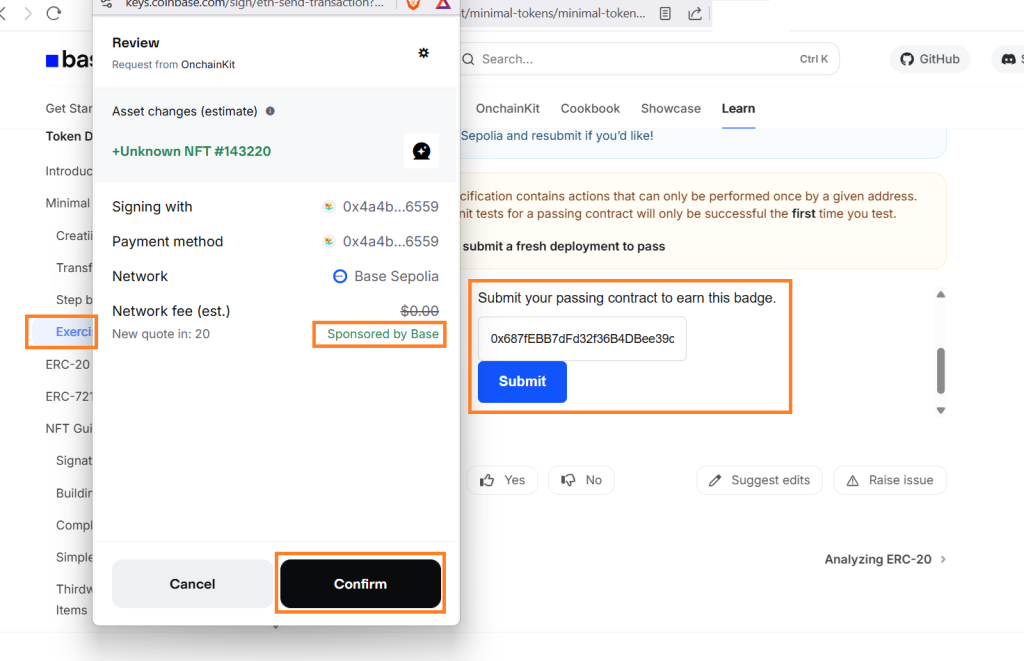
🔹 9. Submit and Claim Your Builder NFT
Go back to the corresponding Exercise page on Base Learn. Scroll to the bottom, connect your Base wallet, and submit your contract address. Once validated, your Builder NFT will be automatically minted to your wallet.
🔹 10. Keep Building and Level Up
Repeat the same process for all exercises to collect more Builder NFTs. When you complete a full set, claim your Builder role on Base Guild. Each completed mission strengthens your on-chain presence — and could make a difference if Base ever rewards early contributors.
🧩 Final Thoughts
There’s no guaranteed Base airdrop — but early users, builders, and creators are always the most likely to be rewarded in any growing blockchain ecosystem.
By trading, building, creating, and joining Base’s community today, you’ll position yourself for any future rewards from Base or its ecosystem partners.
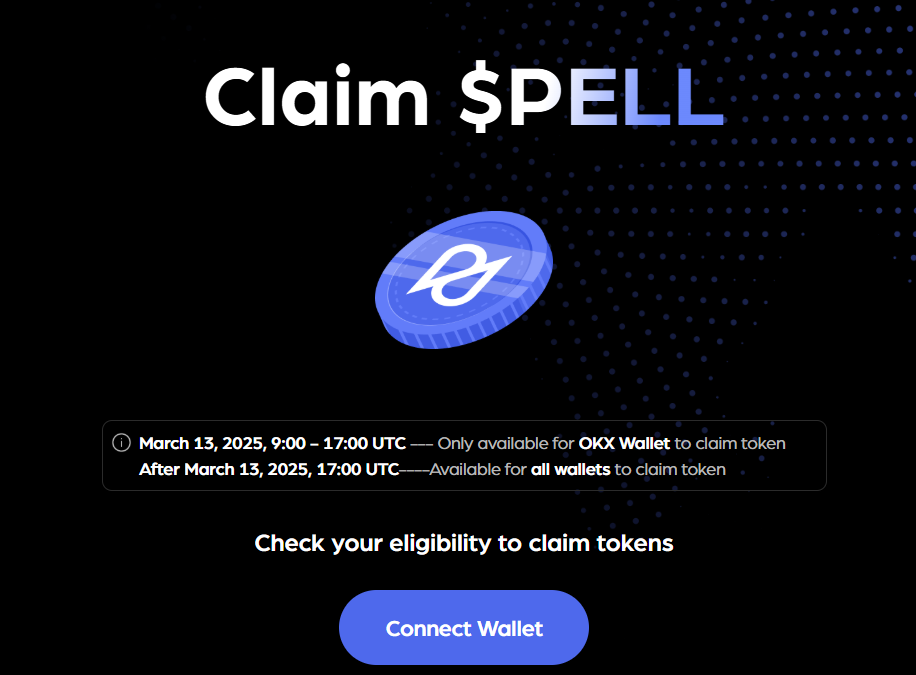
The Pell Network has officially launched its airdrop claim, opening the gates to early adopters and restakers eager to participate in the next evolution of crypto infrastructure. As restaking continues to redefine economic security, Pell stands out by bringing this innovation to Bitcoin—the most trusted and secure asset in crypto. But Pell isn’t just about hype; it’s building a modular security layer with tangible use cases and a strong economic model that could reshape how Bitcoin is leveraged across decentralized ecosystems.
What is Pell Network?
Pell is a restaking protocol that enables users to stake BTC to secure modular services, known as Actively Validated Services (AVSs), similar to what EigenLayer has introduced on Ethereum. It allows Bitcoin holders to put their capital to work, generating yield by securing decentralized oracles, bridges, data availability (DA) layers, and more—all without needing to bootstrap new validator sets from scratch.
How Pell Works: Bridging Bitcoin to Modular Security
Since Bitcoin does not natively support smart contracts or staking, Pell enables BTC restaking via liquid staking tokens (LSTs) such as wBTC, tBTC, and BTCB across EVM-compatible blockchains like Ethereum, BNB Chain, BoB network, Core, ZetaChain and others. Users stake their LSTs on Pell’s platform, which then restakes them to provide slashing-backed security for AVSs. In return, AVSs pay fees for this security, and rewards are distributed to BTC restakers. This structure enables Pell to bring Bitcoin’s economic weight into modular crypto infrastructure while maintaining a decentralized, slashing-compatible security layer.
How Pell Compares: EigenLayer, Karak, and Beyond
While EigenLayer pioneered Ethereum restaking and Karak is pushing a cross-chain approach, Pell is uniquely positioned to capture the untapped value of Bitcoin’s idle liquidity. Where EigenLayer focuses on ETH-based AVSs and Karak explores multi-chain restaking, Pell applies Bitcoin’s economic weight as collateral for AVS security.
Competitors like BounceBit and Babylon also aim to bring restaking or timestamped security to Bitcoin, but Pell’s architecture prioritizes slashing-backed guarantees and modular integration, making it more aligned with the EigenLayer thesis, but for BTC-native environments.
Potential Use Cases for Pell AVSs
Oracle networks secured by BTC restakers
Bitcoin-backed bridge networks and zk-rollups
Data availability layers with slashing mechanisms
Coordination layers for multisig custody and validator committees
Revenue Streams and Economic Incentives
AVSs will pay Pell in BTC or PELL tokens to lease security. Fees are then distributed to BTC restakers and validator operators. Pell may also implement token buyback programs and burns to enhance value capture. While EigenLayer has already demonstrated a potential $100M+ annual revenue model through AVS consumption, Pell could unlock similar value from Bitcoin’s vast liquidity pool.
Who’s Behind Pell?
Although detailed founder information is still limited, Pell has drawn early attention from restaking enthusiasts. It is actively engaging with AVS developers and modular infrastructure providers. As the ecosystem matures, we can expect integrations and AVS partnerships to be formally announced.
Risks to Consider
As with any early-stage crypto protocol, Pell faces several risks:
Technical risks in slashing arbitration and AVS reliability
Smart contract risks
Limited AVS adoption until network effects grow
Custodial or bridge-based BTC staking mechanisms introducing centralized points of failure
Market volatility and uncertain regulatory outlook for BTC-based DeFi
Pell offers a bold new vision for Bitcoin—one where BTC is no longer passive capital but a foundational layer in modular crypto security. But with innovation comes risk, and early participants should weigh the upside carefully against potential protocol maturity hurdles. As the airdrop goes live, Pell marks the beginning of a new narrative: Bitcoin as the backbone of decentralized security. Don’t forget to check if you are eligible for the airdrop!
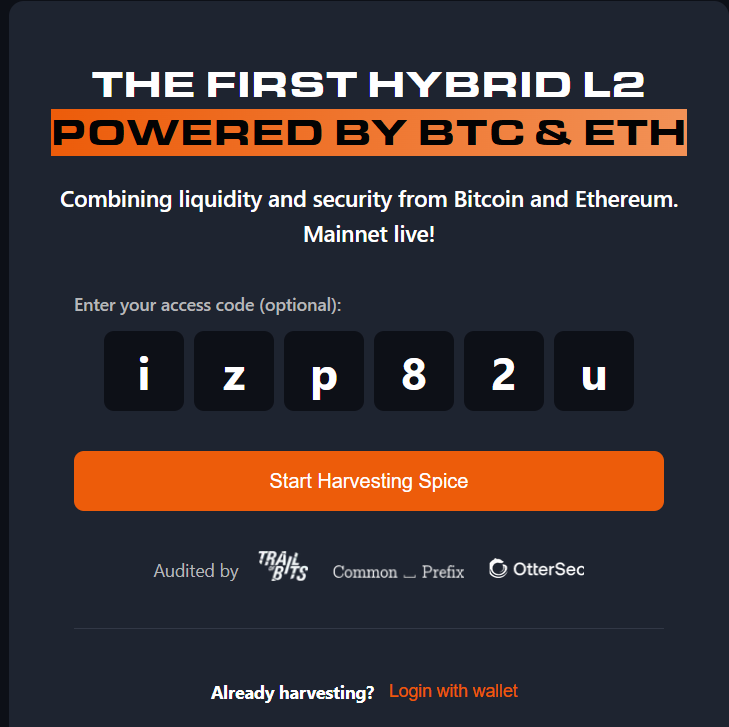
Bob Network is a Layer 2 scaling solution for Bitcoin that enables faster, cheaper transactions and advanced features like smart contracts while relying on Bitcoin’s base layer for security. Recently, Bob became a Babylon-secured network, leveraging Babylon’s system that taps into Bitcoin’s hash power to enhance security for Bitcoin-compatible chains. This integration also supports the ecosystem of Bitcoin Liquid Staking Tokens (LSTs) by providing a secure foundation for staked Bitcoin to interact with decentralized applications, ensuring both liquidity and the robust security of the underlying asset.
You can find more information about Bitcoin Liquid staking in our previous article. This article will provide a step by step tutorial on how to participate in the last season for farming BOB layer2 and likely getting qualified for the Airdrop. The focus will be more for Ethereum familiar users.
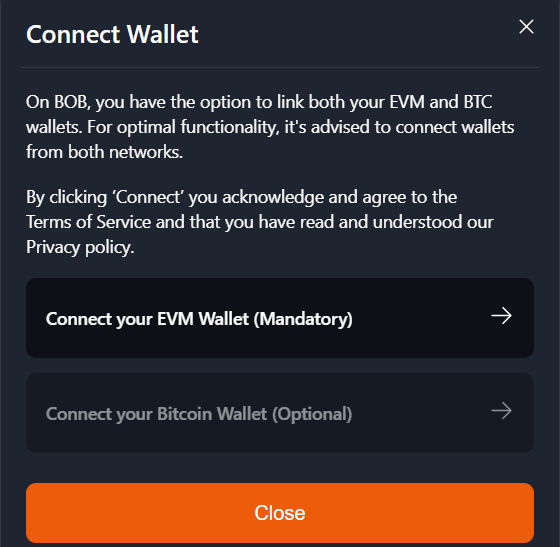
If you hold Bitcoin and wish to bridge it to BOB, you can connect your Bitcoin wallet. For this tutorial, however, we’ll focus on bridging Ethereum assets from other Layer 2 networks such as Base or Linea.
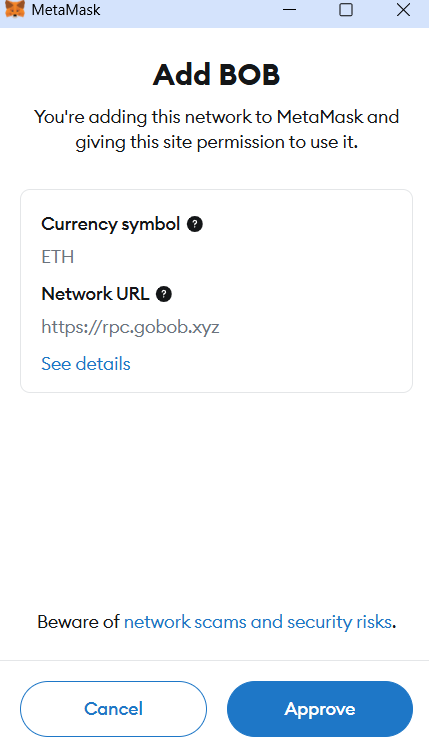
Add the BOB Network to Your Wallet:
Add the BOB network to your wallet by following the on-screen instructions.
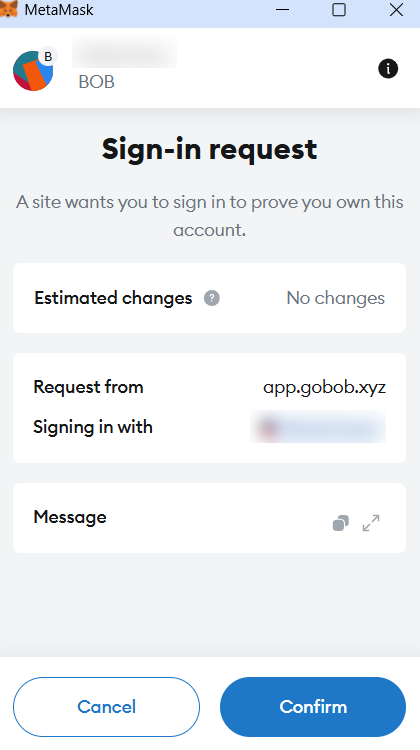
Sign a message to confirm (this step does not require gas fees).
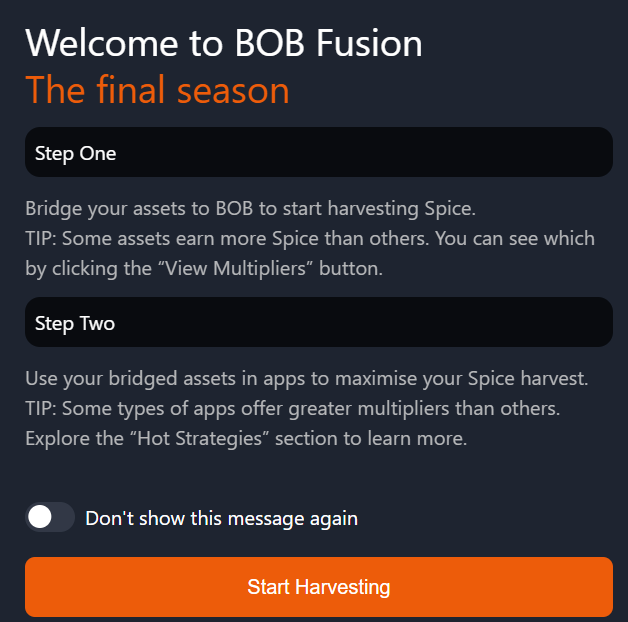
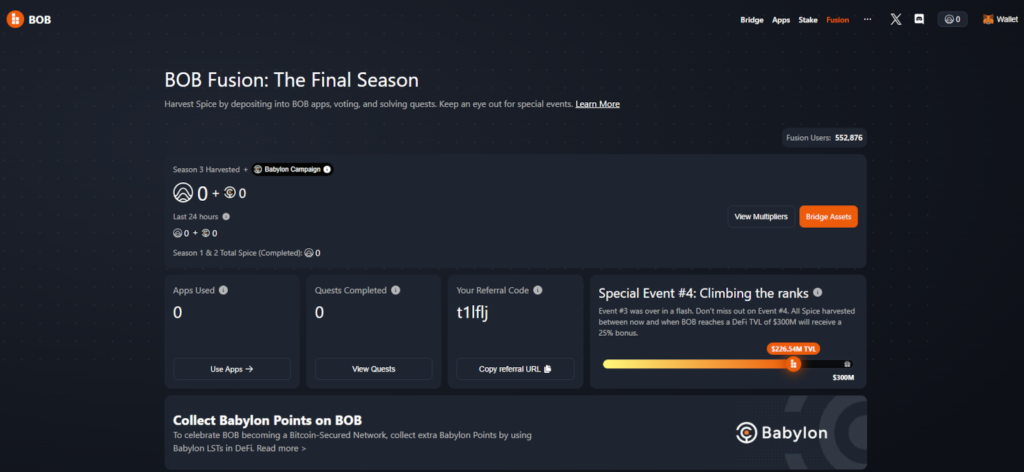
Access the Welcome Page:
After successfully connecting your wallet, you will be redirected to the welcome page.
Click on “Start Harvesting” to begin. Superchain users will receive bonus points.
Step 2 – Intract quests
Complete quests on Intract. This step is optional, but it might help for the airdrop.
Navigate the BOB dashboard via the menu bar in the top-right corner, where you’ll find:
Fusion: Your personalized dashboard.
Bridge: Access native and third-party bridges to move assets to the BOB network.
Apps: A directory of apps available for farming points and interacting with the ecosystem.
Stake: A one-click staking solution to get LSTs (liquid staked bitcoin).
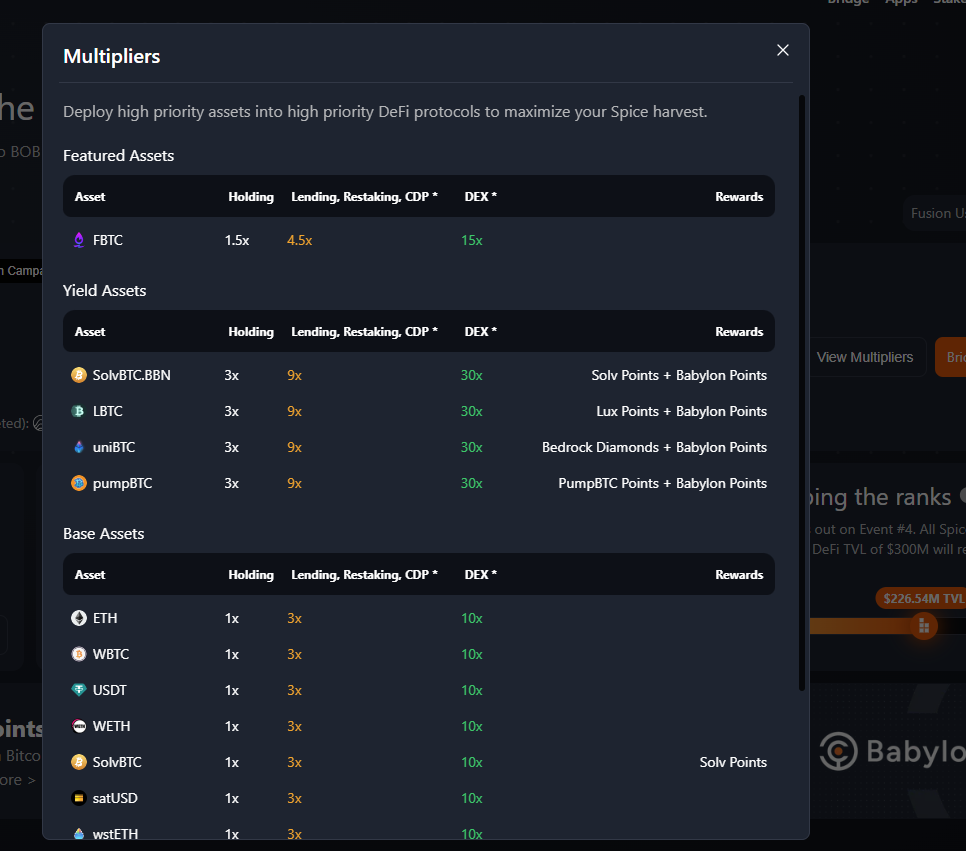
Multipliers: You can view the points multipliers for each asset. Bitcoin LSTs offer the highest multipliers, making them the most rewarding option. However, if you prefer, you can keep your assets in Ethereum or USD and still participate.
Step 4 – One-Click BTC Staking
Stake Bitcoin seamlessly by clicking on the “Stake” button to acquire Bitcoin LSTs. To proceed, connect your Bitcoin wallet and bridge your Bitcoin to your BOB EVM wallet, selecting your preferred LST. Each LST allows you to earn points in its respective project, with many also contributing to your Babylon points balance. For a detailed step-by-step guide, follow this guide.
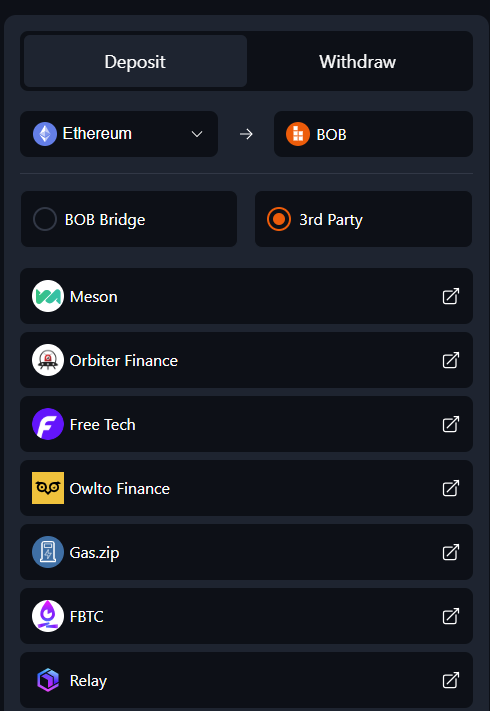
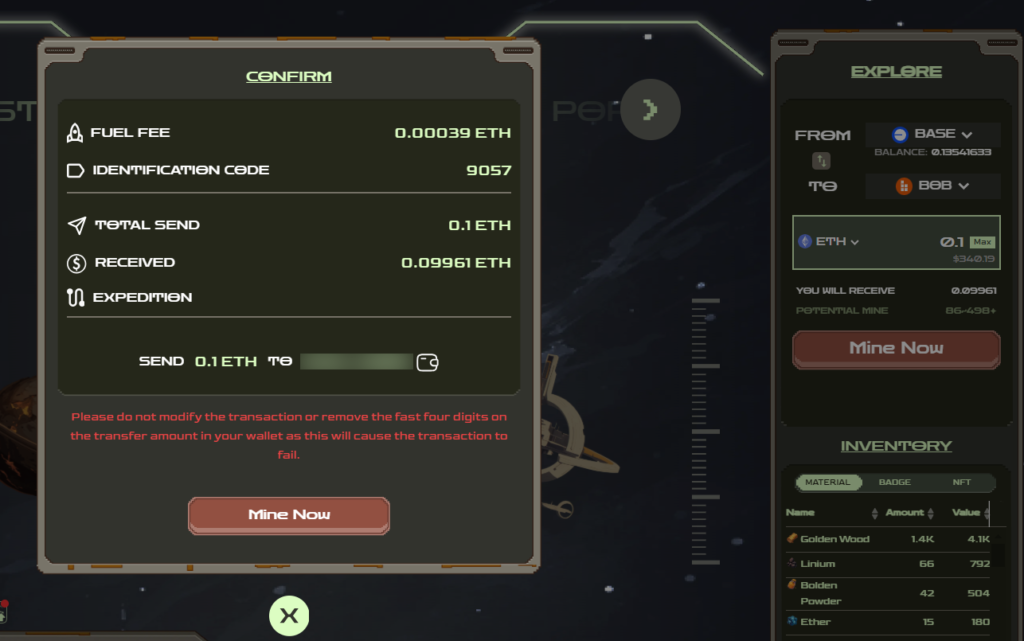
Step 5 – Bridge assets from Ethereum L2
If you don’t have a Bitcoin wallet, you can bridge assets from Ethereum instead. Use the BOB native bridge for transfers from the Ethereum mainnet, or opt for a third-party bridge to move assets from a Layer 2 network. You can use 0xastra, owlto or any other bridge that is supported. Choose the option with the lowest fees
Bridging 0.1 ETH from Base to the BOB chain costs approximately 0.00039 ETH on 0xastra. If you’re bridging from Arbitrum, you also have the option to bridge WBTC directly, providing more flexibility.
You can keep ETH on the BOB network and use it to provide liquidity. However, note that the multiplier for points is lower than that of Bitcoin LSTs. In this guide, we’ll convert ETH to Bitcoin LST and use it in DeFi strategies, but you can choose the asset that aligns with your preferences. You’re not obligated to follow our strategy.
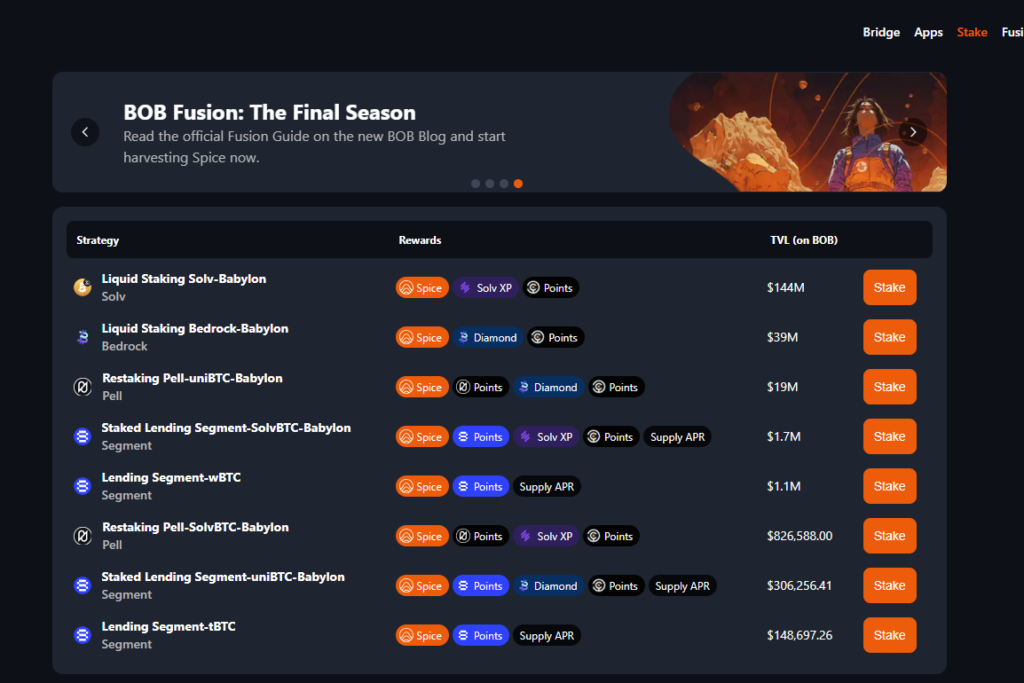
Step 6 – Review you strategy
Review the strategies outlined in the BOB dashboard to optimize your points and familiarize yourself with the available apps.
Step 7 – Convert ETH to solvBTC
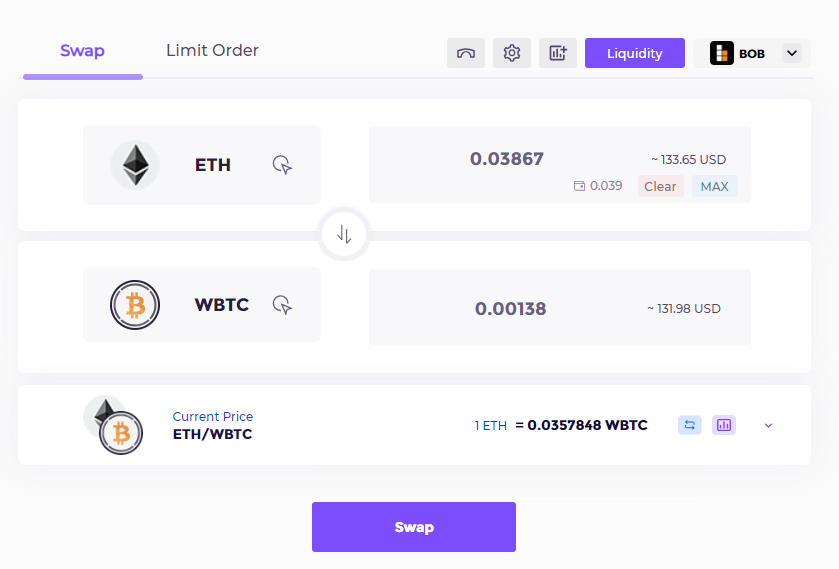
If you didn’t bridge WBTC directly to the BOB network, you’ll need to first convert ETH to WBTC, as there’s currently no direct route from ETH to SolvBTC.
We used izumi.finance to convert ETH to WBTC, but you can use any DEX listed in the BOB apps directory.
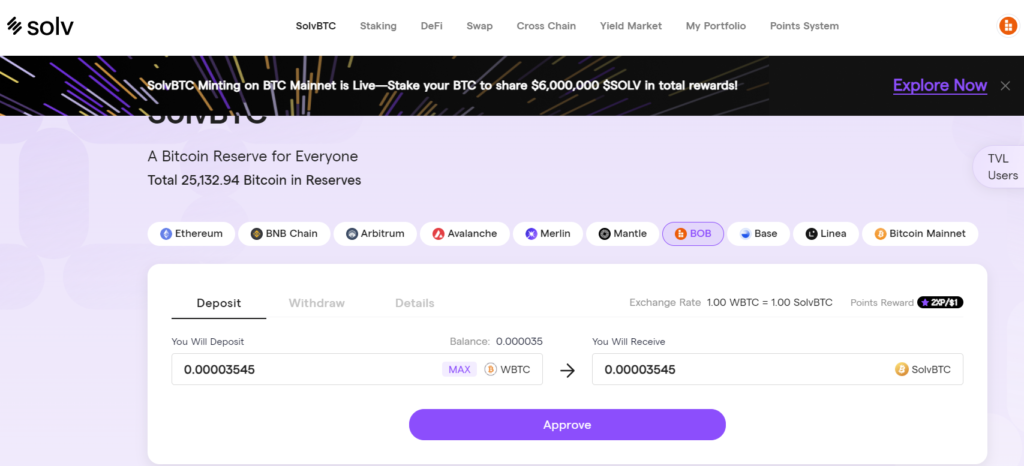
Once your WBTC is ready, visit solv finance on the BOB network to convert it to SolvBTC.
From the menu, select SolvBTC, ensure you’re on the BOB network, and complete the conversion from WBTC to SolvBTC.
Leverage SolvBTC in DeFi:
With SolvBTC, explore DeFi opportunities to maximize your points. Start with platforms like Pell Network and Segment Finance, or check the full list of supported apps in your Fusion dashboard.
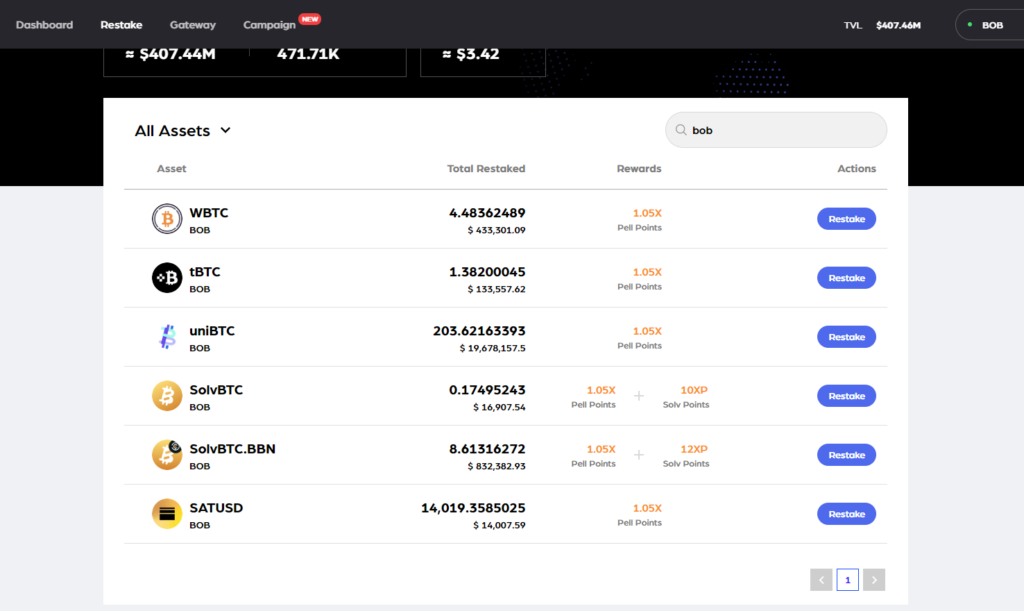
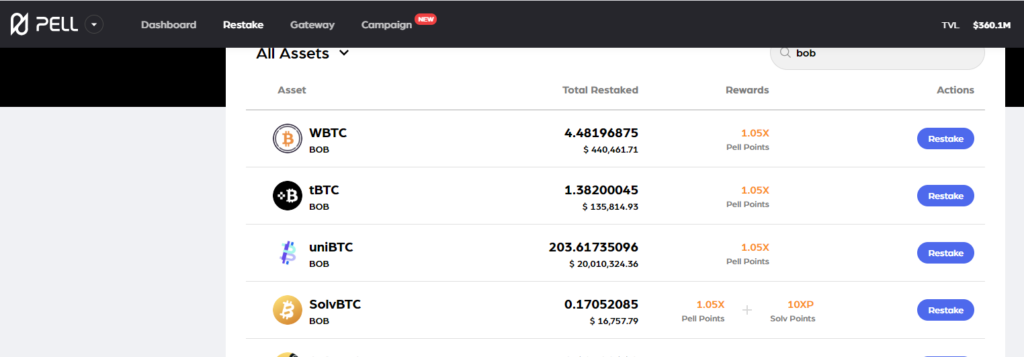
Step 8 – Pell network
Pell network is a restaking platform, similar to Eigenlayer or Karak on Ethereum. It supports assets on BOB, including SolvBTC, and offers opportunities to earn Pell and Solv points. Restaking SolvBTC is straightforward and benefits from BOB’s low gas fees. Additionally, Pell’s airdrop campaign provides exposure to multiple rewards.
Here are the assets supported for BOB. You can restake the SolvBTC we just acquired in step 7.
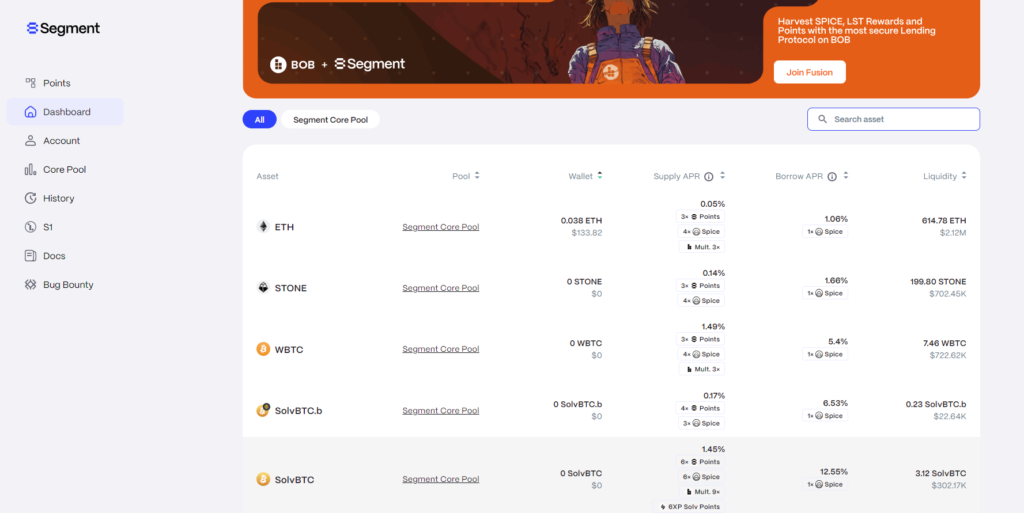
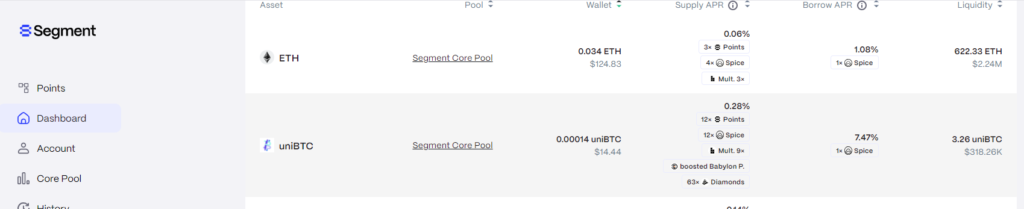
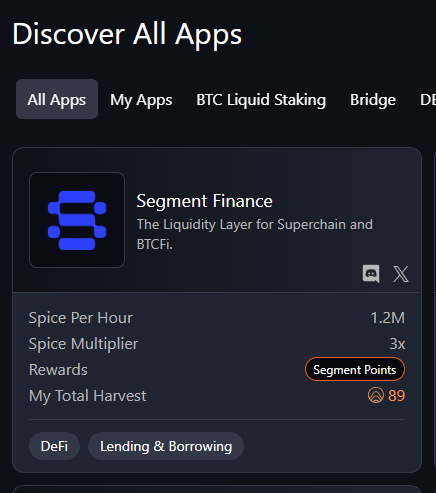
Step 9 – Segment finance
Segment Finance allows you to supply assets and borrow against them. You can loop borrowed assets back into your supply to maximize returns.
After connecting, visit the Segment dashboard to explore pools and see the points earned when supplying SolvBTC.
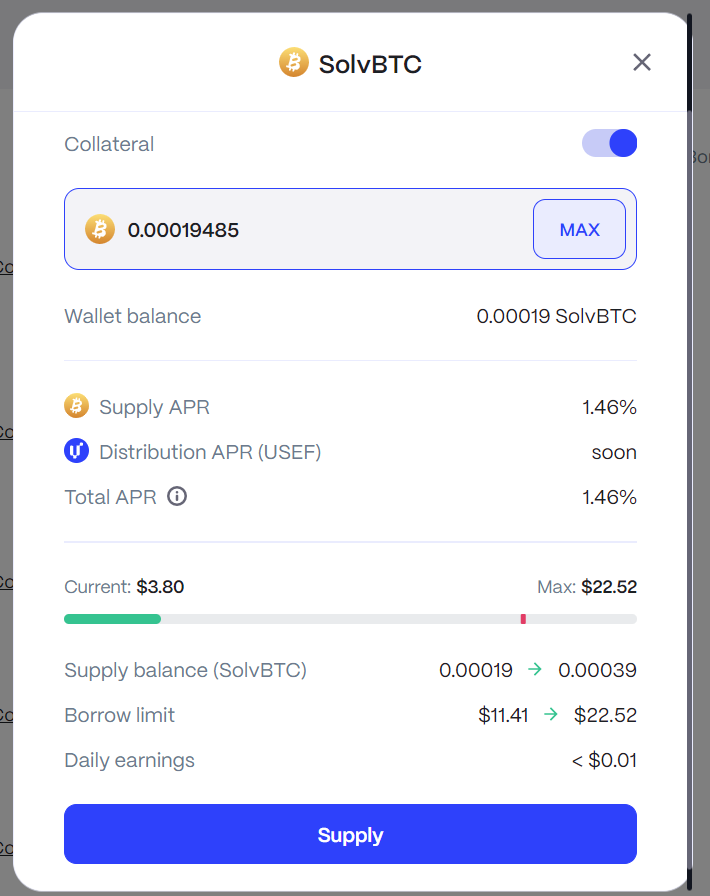
Supply your SolvBTC, enable the collateral toggle, and borrow SolvBTC while staying within safe limits to avoid liquidation. Repeat the process based on your risk tolerance.
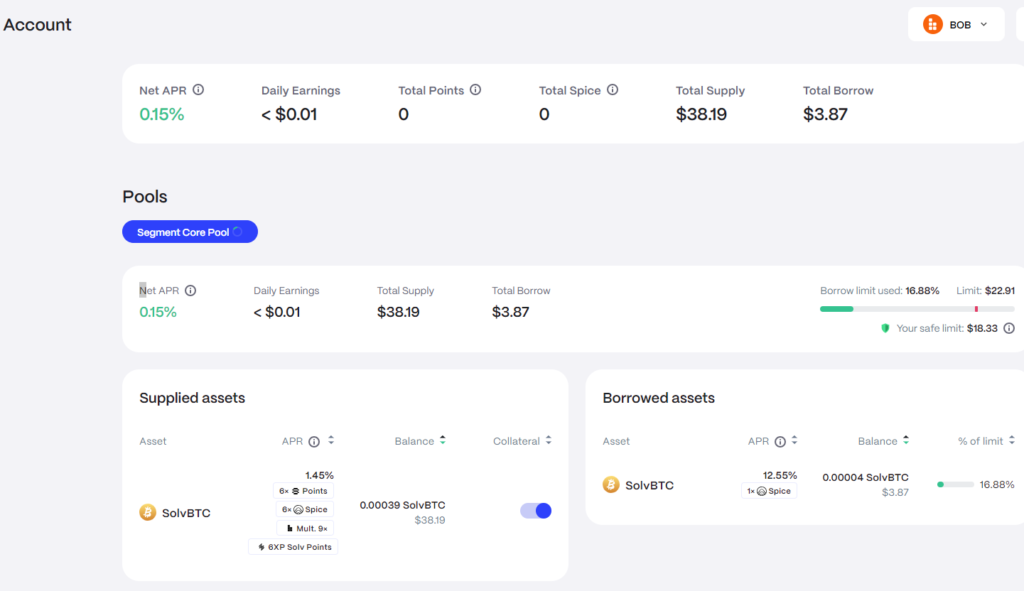
Finally, review your account to ensure your net APR is as expected and you are compliant with all risk parameters.
You can supply ETH and borrow Bitcoin LRT assets such as uniBTC, LBTC, or SolvBTC against it. This allows you to obtain Bitcoin LRT without swapping your ETH. However, since ETH and BTC are not correlated, you will need to actively monitor price movements to avoid liquidation.
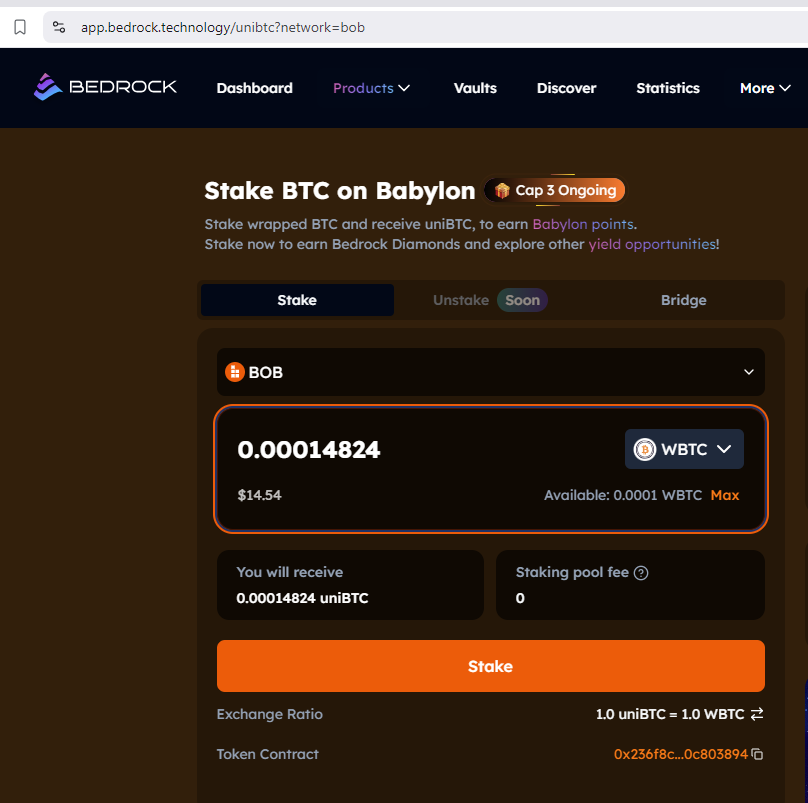
Step 10 – BedRock LST
You can convert your WBTC to BedRock’s LSTuniBTC. This will help you get Babylon points and Bedrock Diamonds while getting Bob points too.
Follow this link and stake your WBTC to uniBTC. Make sure you are on the BOB network. Be careful, the unstake feature is not available yet. You can always swap them to other assets using oku.trade with some price impact (step 11).
Once you receive your uniBTC, you can go to Pell network (Step 8) to restake them or Segment finance (Step 9) to lend them. You could use them in any other DEFI app.
Here is the restaking asset uniBTC on Pell network. Always make sure you are on the BOB network.
It is important to note that unstaking from Pell has a 7 days pending period. Withdrawal from Segment is instant if you repay enough debt to cover the liquidation threshold.
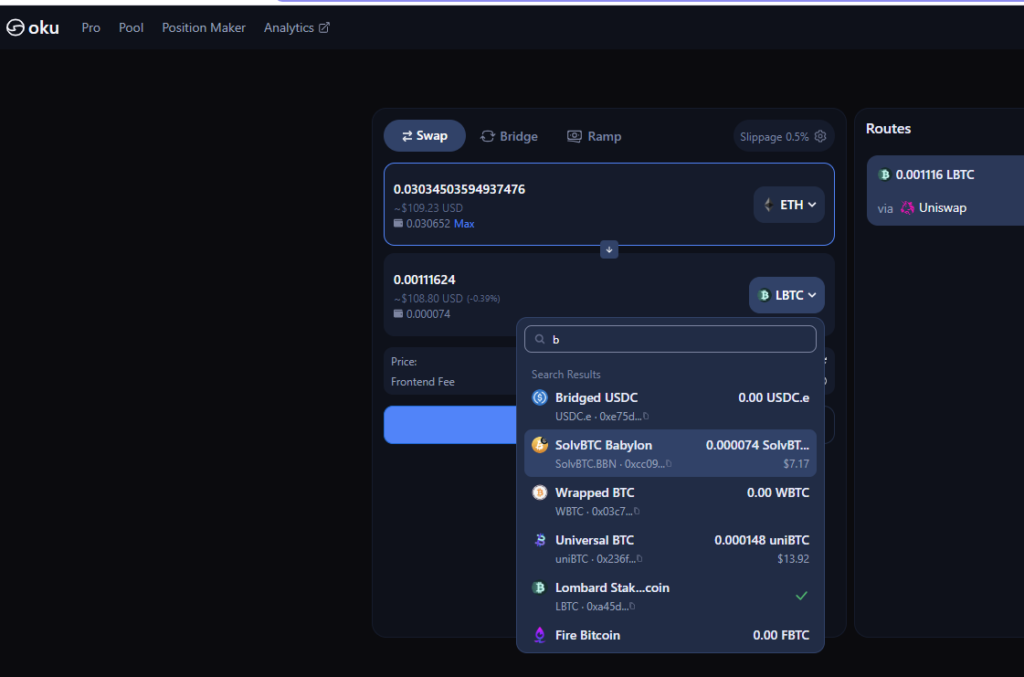
Step 11 – Provide liquidity to a DEX
You can go to oku.trade to swap you ETH or WBTC directly into a Bitcoin LST. Make sure you are on the BOB network. You can choose between SolvBTC.BBN, uniBTC or LBTC. They have the best multipliers for BOB points.
Once your Bitcoin LST is ready, you can provide liquidity to a pool. Bitcoin-backed LST pairs generally carry a lower risk of impermanent loss, as long as they remain pegged to Bitcoin. However, always review the associated risks, including potential depegging events. Make sure you choose a pool that has a good amount of liquidity.
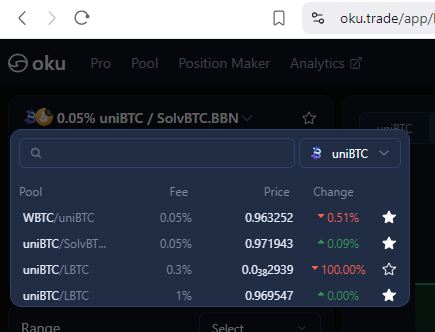
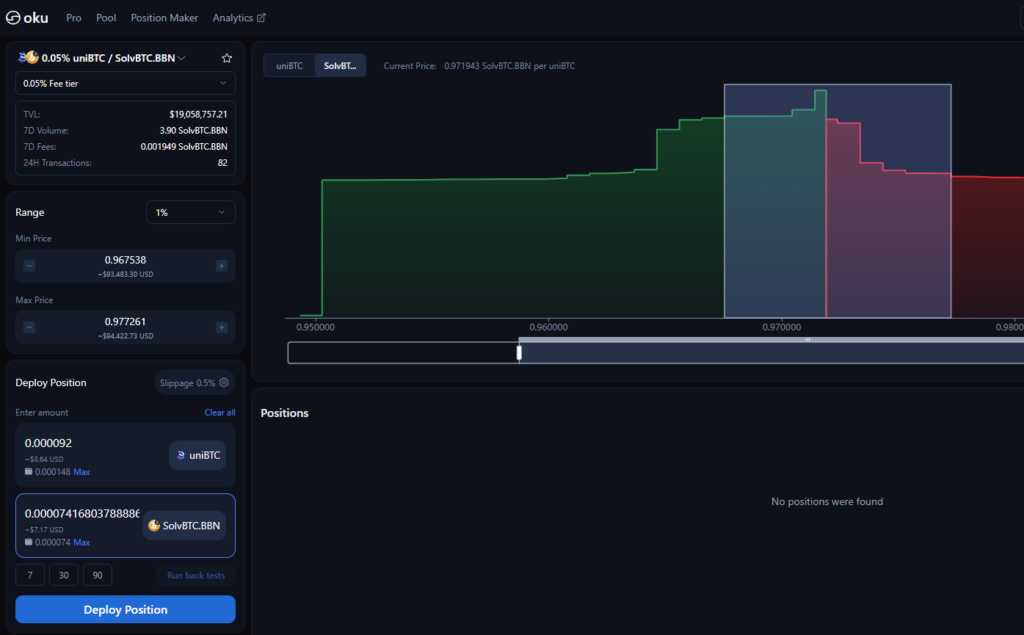
Go to “Position maker” and choose a pool:
In this case, we chose uniBTC / SolvBTC.BBN. Select your desired range, add the liquidity amounts and click on Deploy position.
Once submitted, you can view your positions:
You can always restake or lend your SolvBTC.BBN, uniBTC or LBTC to Pell network (Step 8) or Segment finance (Step 9) allowing you to accumulate additional points in those platforms.
Step 12- Ongoing Management – Fusion Dashboard
Regularly check your Fusion dashboard for updates, new quests, and performance metrics. Adjust your strategy to maximize points and rewards depending on each app’s performance.
Understanding the risks
Farming on BOB involves multiple layers of complexity and risk. Your Bitcoin, originally on the Bitcoin mainnet, is now wrapped in multiple smart contracts and represented as a Bitcoin LST (e.g., SolvBTC) on BOB. These layers, secured by Babylon or other protocols, are exposed to potential bugs or vulnerabilities. Any issue in these contracts could lead to severe asset loss. Additionally, Bitcoin’s price volatility and your long-term holding strategy should also be considered. Only invest what you are ready to lose, conduct thorough research, and stay informed about potential risks.
To provide the best experiences, we use technologies like cookies to store and/or access device information. Consenting to these technologies will allow us to process data such as browsing behaviour or unique IDs on this site. Not consenting or withdrawing consent, may adversely affect certain features and functions.
Functional
Always active
The technical storage or access is strictly necessary for the legitimate purpose of enabling the use of a specific service explicitly requested by the subscriber or user, or for the sole purpose of carrying out the transmission of a communication over an electronic communications network.
Preferences
The technical storage or access is necessary for the legitimate purpose of storing preferences that are not requested by the subscriber or user.
Statistics
The technical storage or access that is used exclusively for statistical purposes.The technical storage or access that is used exclusively for anonymous statistical purposes. Without a subpoena, voluntary compliance on the part of your Internet Service Provider, or additional records from a third party, information stored or retrieved for this purpose alone cannot usually be used to identify you.
Marketing
The technical storage or access is required to create user profiles to send advertising, or to track the user on a website or across several websites for similar marketing purposes.