The crypto bull run is gaining momentum, with all eyes on Bitcoin. However, memecoins are stealing attention, boosting the Solana ecosystem. Memecoins are popular for onboarding new users, as they promise quick or life-changing gains. The thrill of trading them feels like a casino rush, driving their appeal.
Traditionally, bull runs start with money flowing into Bitcoin, then large-cap altcoins, small caps, and finally memecoins and NFTs. This time, it’s different. The run began with Bitcoin, followed by a mix of last cycle’s large caps (Algorand, XRP, Cardano) and memecoins.
While the Base ecosystem seemed ready to lead the memecoin mania, Solana overtook it with the success of PumpFun.
Many crypto “influencers” are even speculating that a utility coin-driven bull run might not materialize this cycle, casting doubt on Ethereum’s potential for significant gains. As we know, smart money often accumulates undervalued or less visible coins with strong narratives and high success potential. Whenever a coin is being shilled on twitter or Youtube, it’s very important to do an extensive research and assess if it’s too late to get in.
Comparing Ethereum and Solana
Let’s compare Ethereum and Solana ecosystems to understand wether Ethereum is underperforming:
As of 20 November 2024
Price
FDV
Volume (24h)
Circulating supply
TVL
Ethereum
3100$
373b
28b
120M
59b
Solana
234$
111b
6.9b
474M
8b
We can see that Solana has approximately four times more tokens in circulation than Ethereum. If Solana had four times fewer tokens in circulation to match Ethereum’s supply, its price could be closer to $1,000 (474/120×234=924$). When considering the supply factor, we can see that Ethereum is around 3 times more expensive than Solana (3100 vs 924).
Let’s see if Ethereum’s performance justifies being 3 times more expensive than Solana.
Performance comparison
Latest revenu
Highest revenu
Transactions
Ethereum
Around 3M per day
Around 203M per day (2022)
Around 1M per day
Solana
Around 5M per day
Around 5.5M per day (2024)
Around 51M per day
If we compare the total value locked, we can see that it is 7 times higher on Ethereum than on Solana. This suggests that Ethereum is viewed as a more trusted chain, where institutions prefer to park assets with fewer transactions but larger amounts. The total value locked will increase rapidly as Ethereum gains in value.
The number of transactions on Solana is currently 51 times higher than Ethereum, however the revenue is only around 2 times higher (As of 20 november 2024 – with all the memecoin mania). While this cements Solana as a leader in transaction throughput, we can view this differently as it takes much more effort on Solana to produce the same revenue. We are also not taking into account all the bundled transactions that are validated on Ethereum through the different Layer2 solutions.
Another factor to consider is that Ethereum set a record revenue of $203 million in a single day in 2022, according to DeFiLlama. While this level of revenue may not be repeated anytime soon—especially with the Dencun upgrade and fee adjustments—it sets a significant milestone for Ethereum’s potential compared to Solana.
Memecoin mania
The memecoin mania will likely shift to other blockchains, particularly Ethereum L2s, as they attract fresh users with lower fees and faster transactions. However, this hype will probably fade toward the end of the bull run. Solana will face significant competition for memecoins in the short term and will need to pivot to new narratives, such as AI, to maintain its performance edge. While it’s likely that the memecoin craze will end with many investors losing money and realizing they were shilled on, the overall hype will eventually subside. This gives a direct strategic advantage to Ethereum.
Both Ethereum and Solana are strong projects that are likely to perform well during the bull run. However, it’s important to understand that the capital flowing into crypto can’t chase all projects at once. Money will rotate between different projects, selecting winners and losers, and shifting narratives multiple times along the way. Investors will aim to profit from the highs and lows of each rotation, ultimately exiting when the bull market begins to fade.
This is why it’s crucial not to fall for narratives or become emotionally attached to a project. Conducting your own research is essential to understand why certain narratives are being pushed and fed to you daily, often obscuring other potential opportunities.
Real World Assets are physical assets, like real estate, commodities, shares, and artwork, that are represented digitally on a blockchain. By converting these assets into digital tokens, investors can buy, sell, and trade smaller portions. This makes previously exclusive asset classes more accessible. This model of fractional ownership broadens access to high-value assets, enabling individuals to invest in items that would typically necessitate significant capital, which in turn enhances investment opportunities.
Tokenized real-world assets (RWAs) offer several significant benefits, such as enhanced liquidity, increased efficiency, and improved transparency. Traditional assets often suffer from illiquidity, making cash conversion challenging. However, tokenization allows these assets to be traded on digital platforms, facilitating quicker and more accessible transactions. The use of blockchain technology provides clear record-keeping and automates processes with smart contracts. It reduces the dependence on intermediaries, cuts costs, and fosters trust. Furthermore, RWAs create new opportunities for diversifying portfolios, giving investors options to allocate risk beyond conventional stocks and bonds.
Despite these benefits, RWAs come with challenges, including regulatory hurdles, valuation difficulties, and security concerns. Different jurisdictions regulate tokenized assets in various ways, creating compliance complexity, and accurately pricing RWAs remains tricky due to their real-world dependencies. Nonetheless, RWAs have the potential to reshape finance, merging traditional and digital markets, increasing global market access, and providing blockchain with practical, real-world applications that could revolutionize investment practices.
We will look at 3 different projects in the space.
Ondo finance
Ondo Finance is a DeFi platform that bridges traditional finance with blockchain by offering tokenized versions of real-world assets, such as U.S. Treasury bills and corporate bonds. This allows investors to access stable, yield-generating financial products within the crypto ecosystem, providing lower-risk, fixed-income opportunities compared to typical DeFi products. By tokenizing these assets and managing them with smart contracts, Ondo enhances accessibility, transparency, and efficiency for both retail and institutional investors, aiming to create a compliant, stable link between conventional finance and decentralized markets.
Ondo is deployed on several blockchain such as Mantle and Ethereum. The treasury bills native tokens (USDY and OUSG) can be bridged from one chain to another and used in DEFI to earn an additional yield.
Mantra
While Ondo’s goal is to tokenize real world assets into tokens, Mantra offers a layer1 solution customized for RWAs. Its goal is to simplify the adherence to regulatory requirements. Mantra is built using the Cosmos sdk and offers ready made modules that developers can build on or leverage such as a compliance ID which offers a single solution for all Mantra Apps for KYC solutions.
Mantra integrated Ondo‘s USDY token and offers it as a genesis asset throughout the blockchain.
Anzen
Anzen Finance specialize in real-world lending, focusing on integrating real-world assets (RWAs) into the DeFi ecosystem. Its goal is to provide stable, yield-generating opportunities. By connecting blockchain-based lending with traditional financial instruments, like loans backed by U.S. Treasury bills or other secure assets, Anzen aims to offer a safer, more predictable alternative to typical crypto-based lending platforms. Any user can provide liquidity to Anzen which will be used to power real world secured loans. Anzen partnered with Ondo by backing part of its reserve with tokenized security deposits backed by Ondo’s token.
Anzen offer a stable coin USDz on several chains (Ethereum, Arbitrum, base, etc…) that is backed by real loans and other financial assets. USDz can be staked to earn around 15% yield. Anzen also offers different strategic vaults and earn additionnal yields by locking your coins for a period of time.
Anzen has presently an airdrop opportunity. All you have to do is hold USDz to start accumulating points. You can buy it directly from Anzen or swap into it on any dex like jumper. If you use your USDz in DEFI on platforms like Aerodrome or Ionic, you can earn a multiplier on your liquidity.
Do not forget to do an extensive research before diving in, because holding USDz comes with risks. USDz can unpeg from real USD if any of the underlying loans has some default. Using USDz on DEFI platforms adds another layer of smart contract risk, impermanent loss, etc…
In our last article, we talked about Rainbow wallet, which is a good alternative to metamask. In this article, we will talk about Rabby wallet, another solid alternative to metamask.
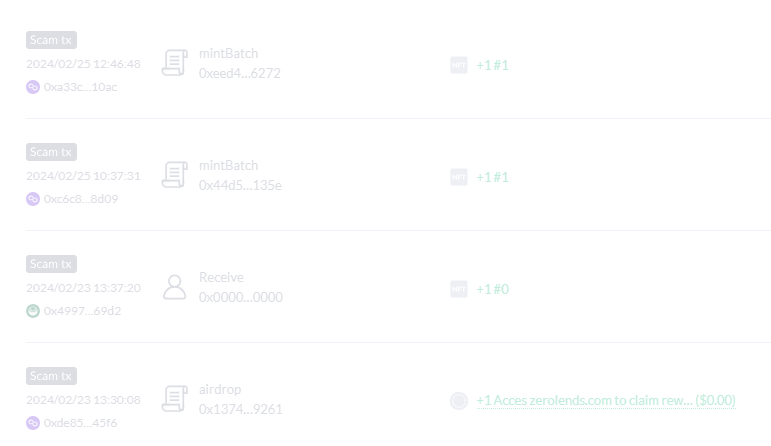
Rabby wallet is an open source crypto wallet built by DeBank. DeBank is a Web3 messenger that lets you send and receive messages to a Web3 address. Debank offers a powerful dashboard that gives you a summary of your assets and investments. You will be able to find all the liquidity pools that you contributed to on many chains. That is very helpful in case we lost track to which pools and protocols we have already deposited to. DeBank also flags the scam transactions in your transaction history. We can’t prevent our wallet from receiving scam transactions for now, so it’s very important to understand them and not to fall to the promising scam NFT we keep receiving:
Rabby wallet offers a seamless multi-chain experience for DeFi users. It uses a pre-transaction potential risk scanning to prevent you of any risk and before you sign a transaction, the balance change will be displayed.
Rabby offers a points system that rewards users for different actions like swapping through the wallet. You can use this code RBYPOINTS to boost your points.
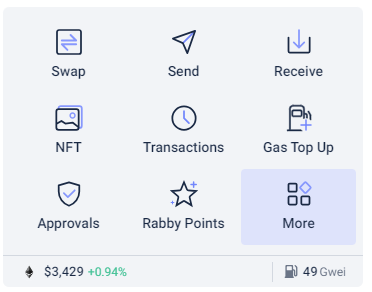
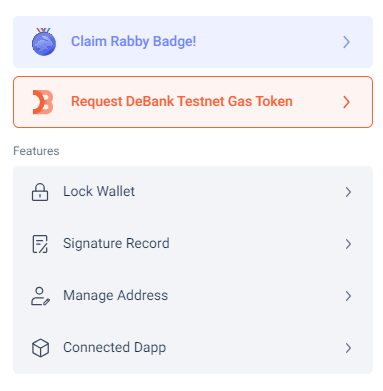
Once you install the wallet, you can connect your hardware wallet, create a new wallet or import an existing one. After the initial setup, you can claim your rabby badge from debank by clicking on the More icon:
And claim your badge:
There are a few steps to complete, essentially making a swap transaction:
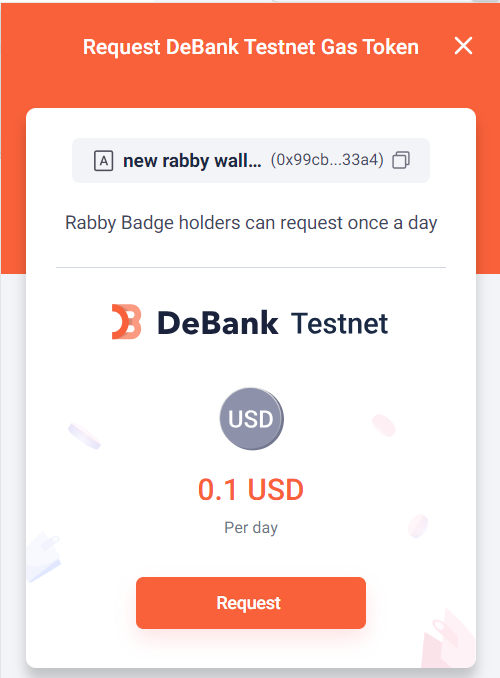
Once completed, you can claim DeBank testnet tokens:
We are surfing the Web hunting for the latest airdrop. A link somewhere says that we are eligible, but we have only a few hours to claim. We rush to the link and connect our wallet… then we get a bit suspicious but it’s already too late.
Scammers are getting very innovative in luring us into traps. We have to be extremely careful where we connect our wallet. Even if the link comes from a trusted source, we still have to double check everything.
We should never sign a transaction that we don’t understand, however most of the time the transactions are not human readable.
Thankfully there are some tools that can identify scams and wallet drainers before they interact with your wallet. Check walletguard, in one click you can scan for risks including approvals, hacks, honeypots & more.
Again, as a good practice, you should do your own research even before using walletguard.
And don’t forget rule #1 regarding your wallet: Never share your secret phrase with anyone.
Fee optimization is a very important part of your crypto journey. Before doing a transaction, it is important to explore all possible ways and choose the strategy that minimizes the fees. This applies to on chain and off chain transactions.
Let’s say for example you want to transfer a given asset from Exchange A to Exchange B. Each exchange has a withdrawal fee, a deposit fee and sometimes a minimum amount that can be withdrawn. In some cases it could be cheaper to sell the token in one exchange for USD and buy it on the other exchange so you don’t lose your position. While this might be tempting, if there’s any capital gain, you will be imposed and pay taxes on it. So you have to be extremely careful and consult with your tax advisor before doing any alienation of assets.
Example
For the following example we suppose it’s cheaper to buy USDC on Coinbase centralized exchange than buying it on MEXC. You need your liquidity on MEXC because it offers a wider variety of coins. In this scenario, it is better to buy USDC on Coinbase and send it to MEXC. We will walk through the steps.
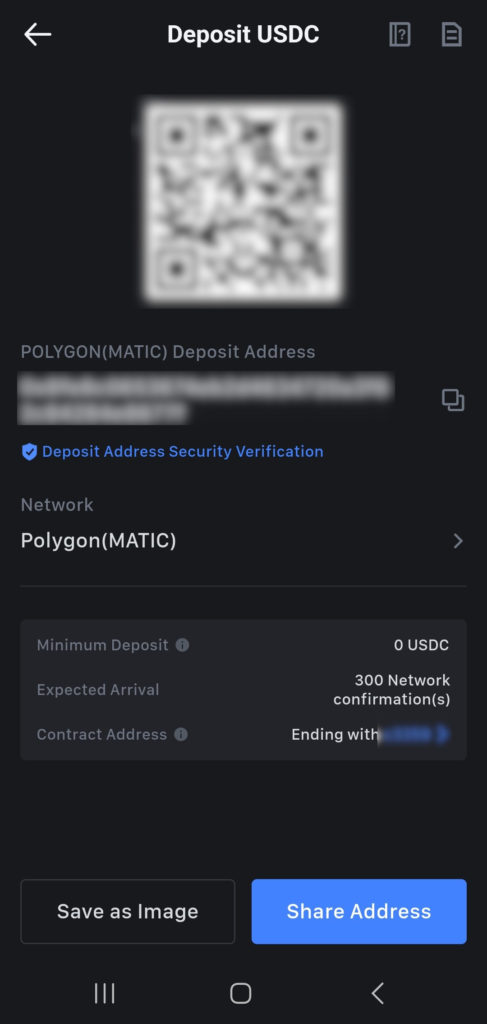
Receiving wallet
First, in your MEXC wallet, navigate to deposit and choose USDC. Then select a network that has low network fees, For example Polygon(MATIC), Once your address is ready, copy it.
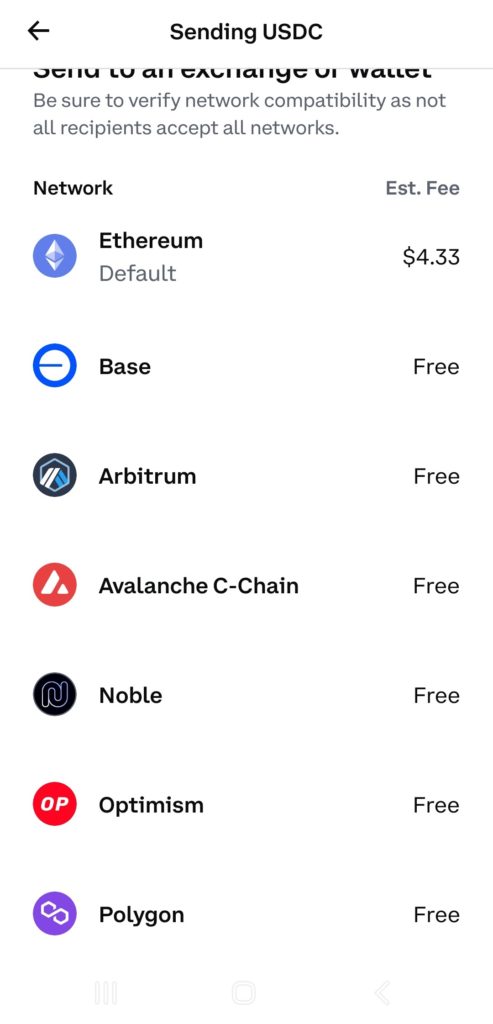
Sending wallet
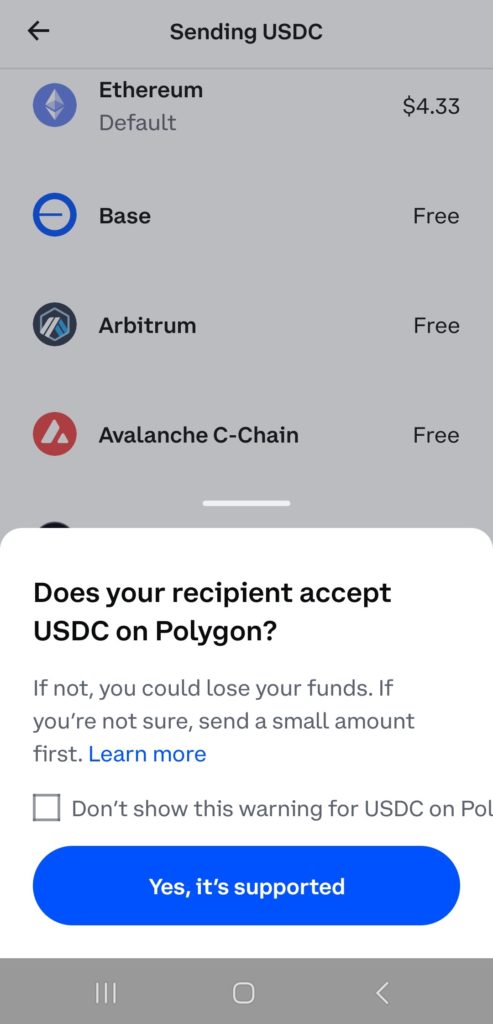
In your Coinbase application, navigate to your USDC account, click on send. You will be prompted to choose a network. Ethereum has the highest fee, and the rest usually have a very low fee, but as of today it is free. It’s probably a promotion from Coinbase because they encourage the usage of USDC since they are early backers of the Circle project.
Make sure you choose the same network that you selected in MEXC, double check that you are sending USDC using MATIC and enter your MEXC address.
You will receive your funds in a few minutes. In MEXC, since most crypto are paired with USDT, you can convert your USDC to USDT for a negligible fee.
Don’t forget, It is always wise to send a small amount first to make sure you receive it correctly before sending the desired amount.
To provide the best experiences, we use technologies like cookies to store and/or access device information. Consenting to these technologies will allow us to process data such as browsing behaviour or unique IDs on this site. Not consenting or withdrawing consent, may adversely affect certain features and functions.
Functional
Always active
The technical storage or access is strictly necessary for the legitimate purpose of enabling the use of a specific service explicitly requested by the subscriber or user, or for the sole purpose of carrying out the transmission of a communication over an electronic communications network.
Preferences
The technical storage or access is necessary for the legitimate purpose of storing preferences that are not requested by the subscriber or user.
Statistics
The technical storage or access that is used exclusively for statistical purposes.The technical storage or access that is used exclusively for anonymous statistical purposes. Without a subpoena, voluntary compliance on the part of your Internet Service Provider, or additional records from a third party, information stored or retrieved for this purpose alone cannot usually be used to identify you.
Marketing
The technical storage or access is required to create user profiles to send advertising, or to track the user on a website or across several websites for similar marketing purposes.