How to lend your assets with Demex
What is Demex
Demex is a new generation decentralized exchange designed for trading complex financial instruments and derivatives across several blockchains. Anyone can be a market maker by contributing liquidity and making money from trading fees. It offers a wide range of features including trading derivatives, lending or borrowing tokens, minting stablecoins and providing liquidity.
The fact that it is a decentralized exchange means there is not 3rd party involved and no custodial. Everything is managed by smart contracts and code.
Risks
While trading cryptocurrencies comes already with a lot of risk because of volatility, trading on a dex adds a smart contract malfunction of hack risk. If something happens no one is liable. So it’s very important to understand the risks and do your own research before using such technologies.
For example, when you supply your favorite coin to a lending pool, users have to deposit a collateral to be able to borrow it. Usually users have to provide more collateral than what they borrow, but they could do so with many different coins. Now let’s say one of the coins on the collateral side looses all its value (let’s say LUNA for example). For sure the lender prefers to get liquidated rather than paying back the loan and returning your favorite coin. So you are left with worthless coins.
As decentralized exchanges get more sophisticated they try to put some guards in place, however it’s still too early for these safety measures to be bulletproof.
You can review the risks stated by demex here.
Lending
That being said, let’s review how you can lend your assets using Nitron on Demex:
We will be using keplr wallet, which is a great wallet mostly for the COSMOS ecosystem.
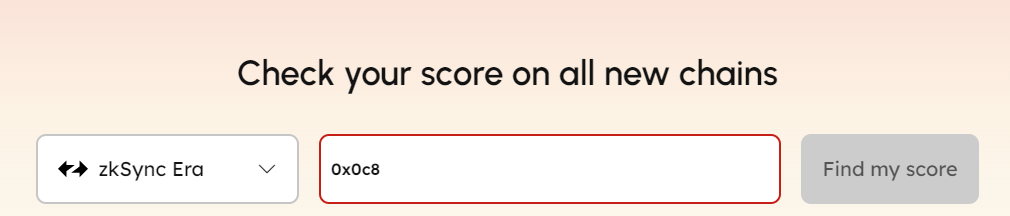
The first step is to connect to demex and create your account. Once this is completed, you can click on “Nitron” and search for the coin you wish to lend:
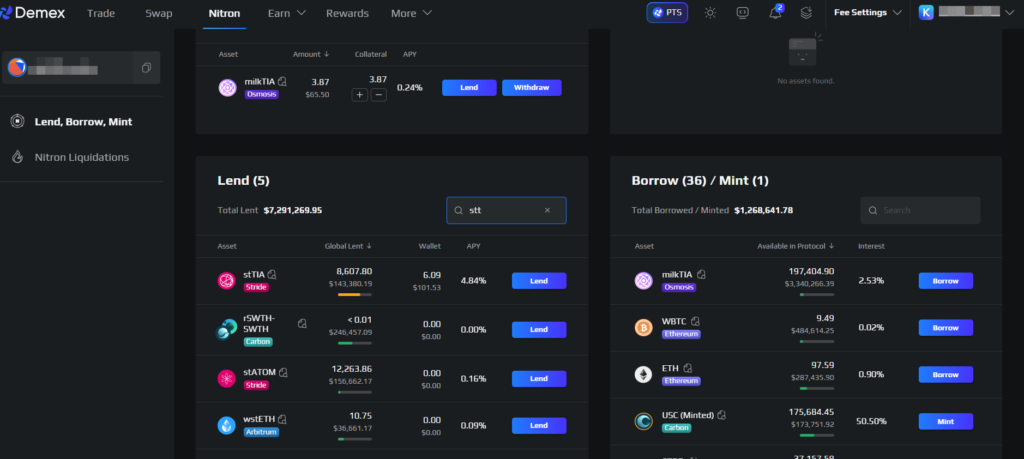
Once you find your coin, click on “lend”. In this example we clicked on stTIA. If you don’t have stTIA on Demex, you will have to deposit some from your wallet. Click on “Deposit”
Transfering your tokens
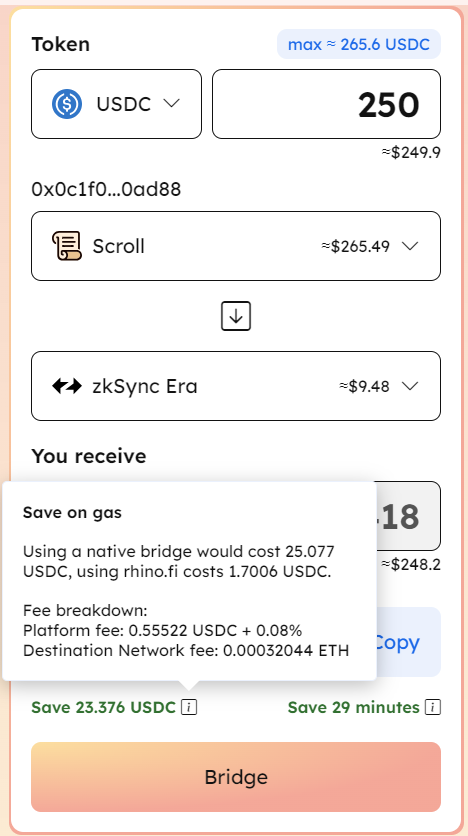
On the next screen, you have to choose the network that has your coins and the balance you wish to transfer to Demex:
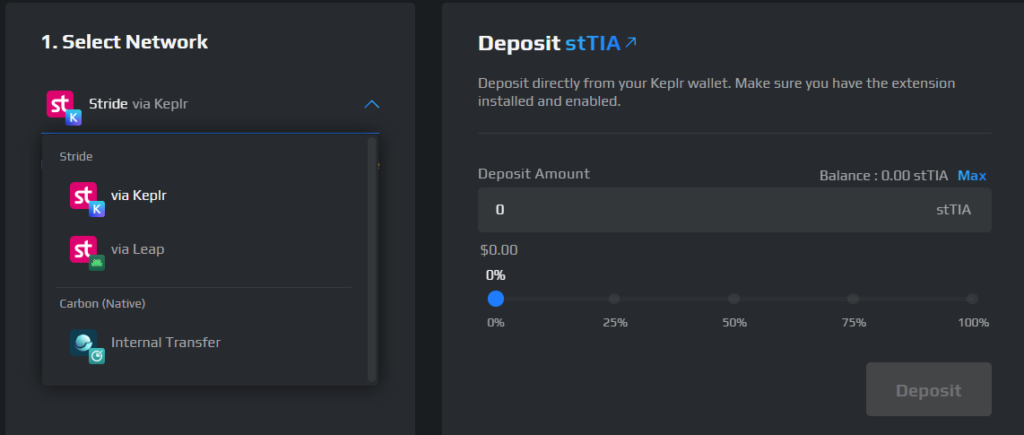
Once you choose the amount to transfer and click on Deposit, you will have to accept the transaction in your wallet. This will trigger and IBC transaction and you will have to pay for the transaction fee with the coin of your chain. In our example, the fees have to be paid using STRIDE coin. The IBC transaction will move the coins from their chain of origin (Stride) to the Demex chain (Carbon).
It is important to note that once your coins are transferred, you might not see them anymore in your wallet, unless your wallet supports displaying your assets that are on Demex/Carbon.
Complete the transaction
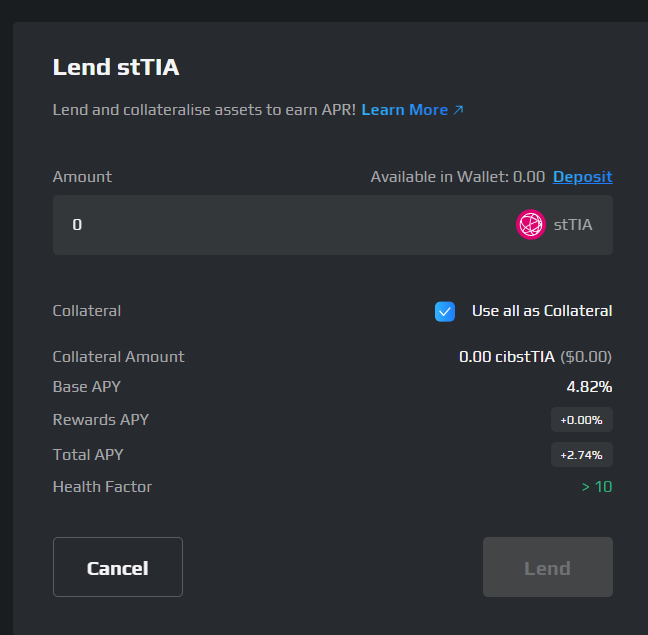
Once completed you go back to the previous step and you can see your coins available to lend:
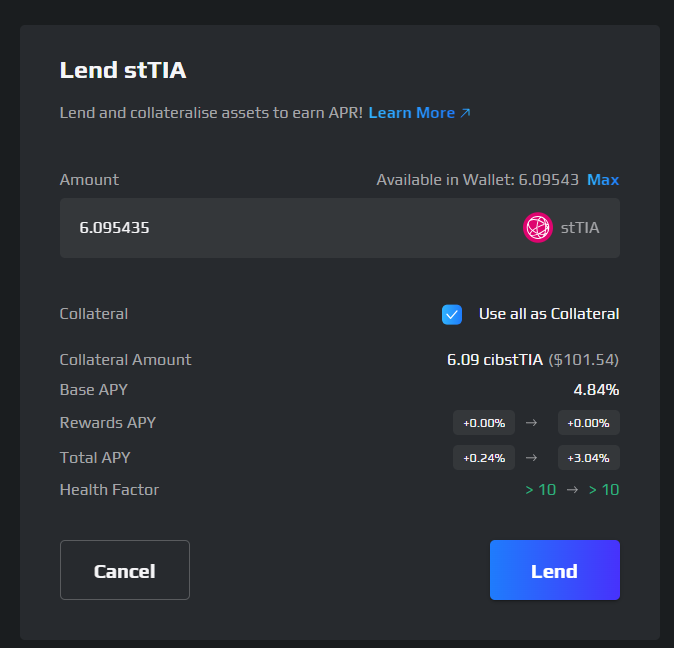
You can choose how much to lend and whether you want all the amount to be available as collateral or not. This means the amount you wish to make available as collateral for future borrowing.
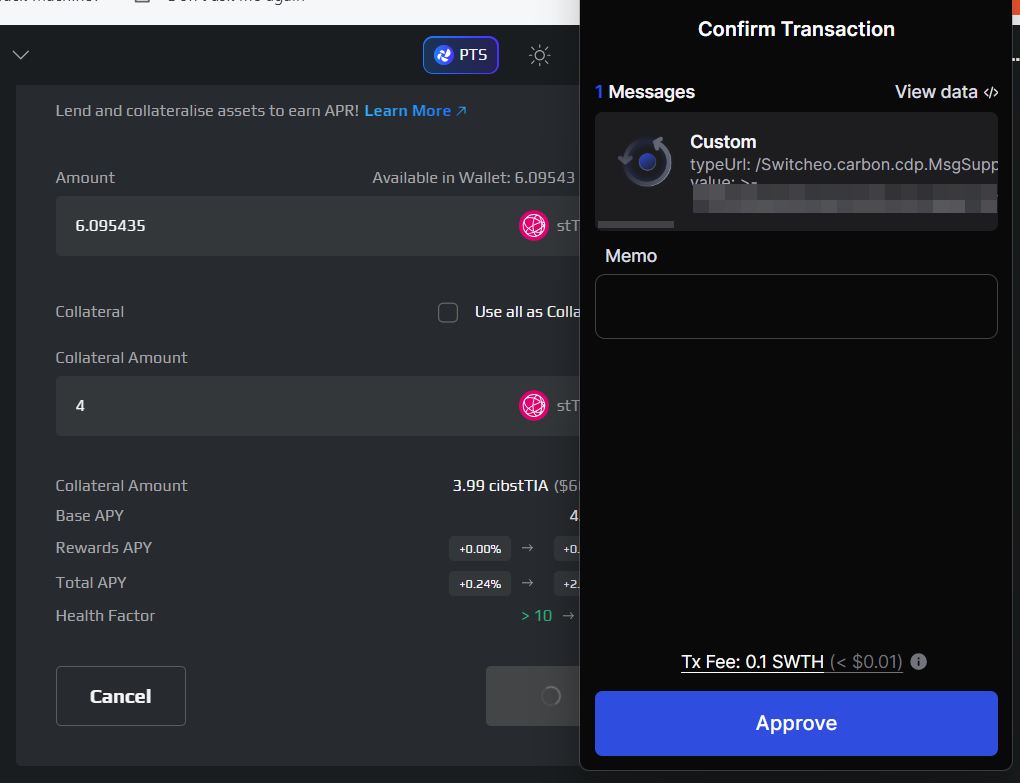
You will have to confirm the transactions in your wallet. Note that the transaction fee is paid in SWTH, which is the coin used for the Carbon chain.
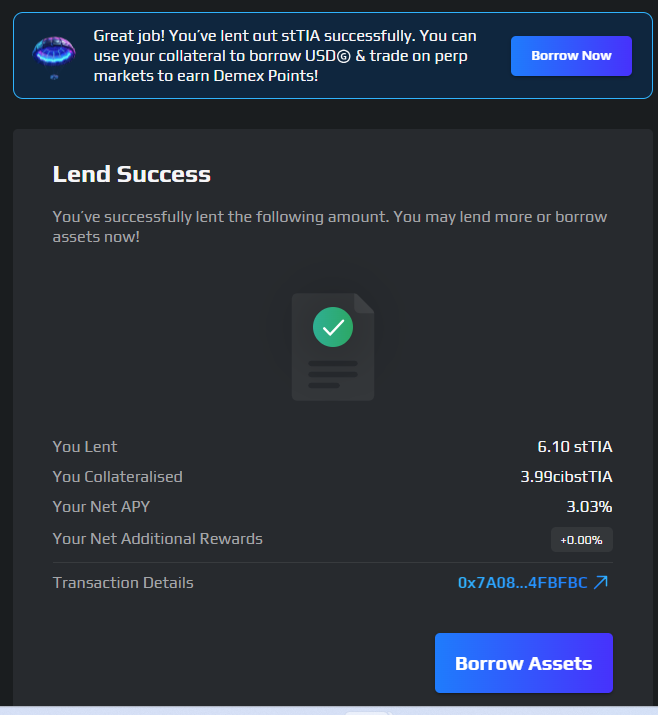
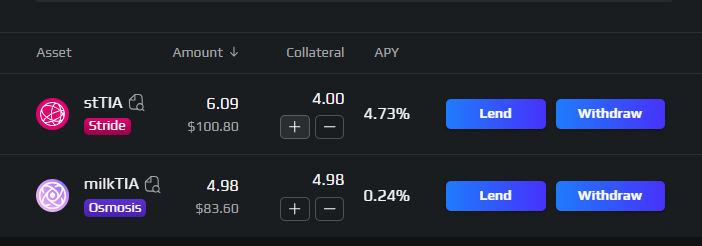
Once completed, you can start borrowing against the collateral portion:
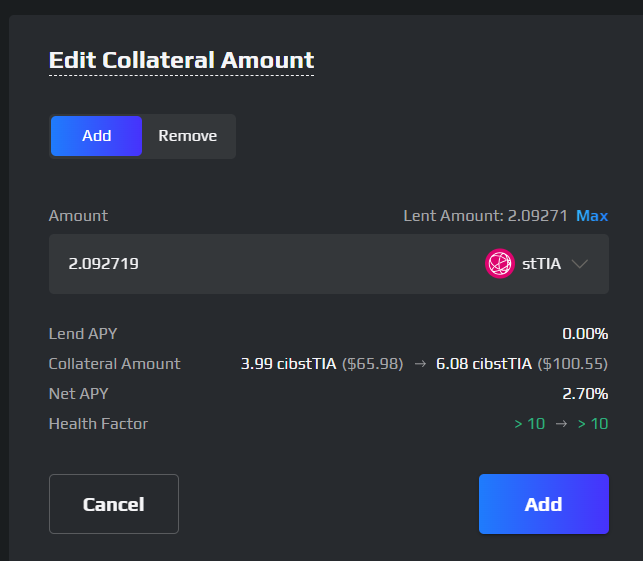
You can always increase or decrease the amount of the collateral later on:
Borrowing
To borrow some funds, find the coin you wish to borrow and click on borrow:

In this example, we are borrowing milkTia:
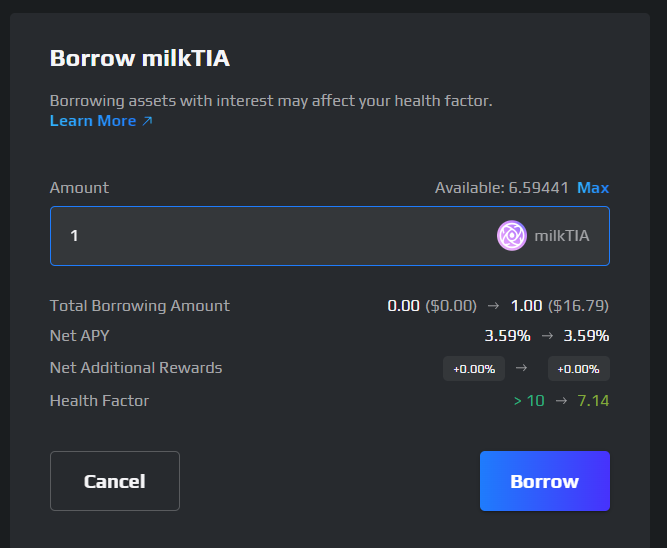
We can borrow up to 6.59 in this example, however that puts us at risk of liquidation. Always check your Health Factor and make sure it’s in a good position. You have to verify it daily and verify the interest rate as it can vary too. A spike in the interest rate can get you liquidated.
In this example, since the provided collateral and borrowed asset are all liquid TIA, we know that there won’t be a lot of price fluctuation. However if your supplied assets value go down while the borrowed asset goes up, you will need to rebalance.
Again, it’s not financial advice, you should do your extensive research before deciding to use these features.
Here’s the result of the borrowing transaction:
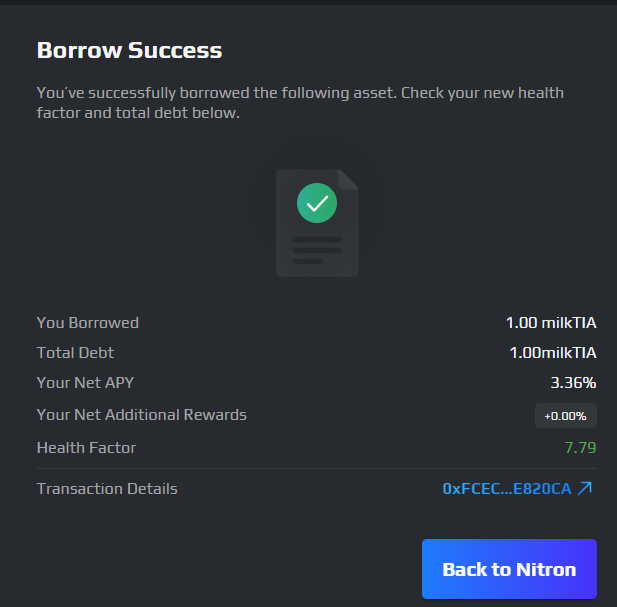
The Nitron dashboard is nicely done, we can see all the information easily:
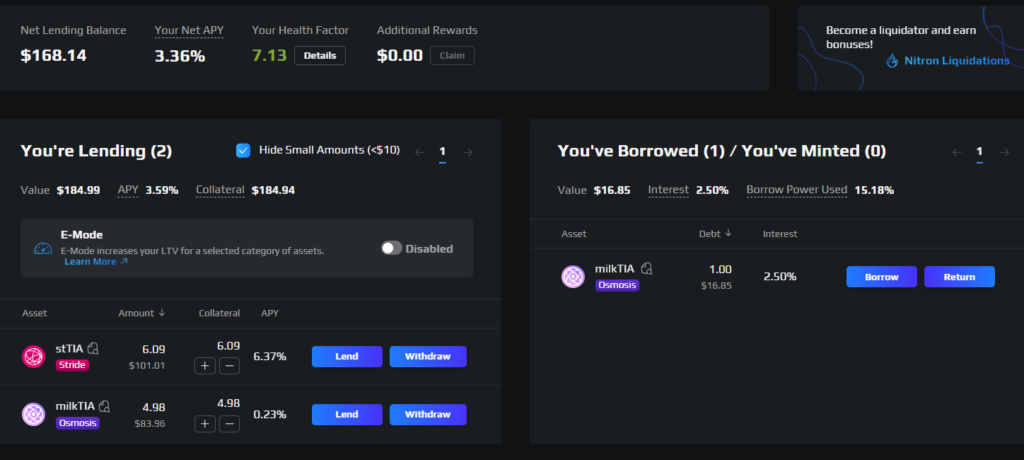
We have our total asset, health factor, net APY and the “return” button very accessible.
The question now is why would we borrow milkTIA or stTIA if we already have some? This strategy applied at scale will increase our holdings and could help us farm the borrowed coin’s airdrop. It depends whether they consider the net balance or total balance for the airdrop. There are no guarantees.
We can also use the borrowed asset to lend it back, which will improve our health:

Don’t forget that by using Demex, you could be eligible for its future airdrop.