In this article, we will go over the steps needed to create your own NFT collection with Zora.
Zora is a new platform that simplifies the process of creating and sharing NFTs.
Prerequisites
You will need an offline wallet with some ETH. Here’s a list of some wallets:
Get ETH on chain
If you don’t already have some Ethereum, you can buy some on a centralized exchange like Mexc and transfer them to your offline wallet.
Zora supports many layer 2 chains for minting an NFT:
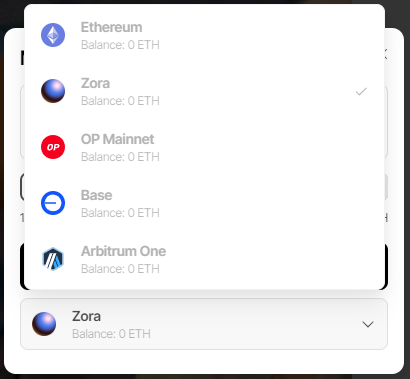
However, to create your collection, you have to use the Zora network. Not a lot of centralized exchanges support sending ETH directly to Zora, so what we can do is to send ETH to Arbitrum, Optimism or base and then bridge them to Zora network.
So as a first step, you withdraw funds from your centralized exchange to let’s say the Base network on your offline wallet. Here’s an example of Mexc:
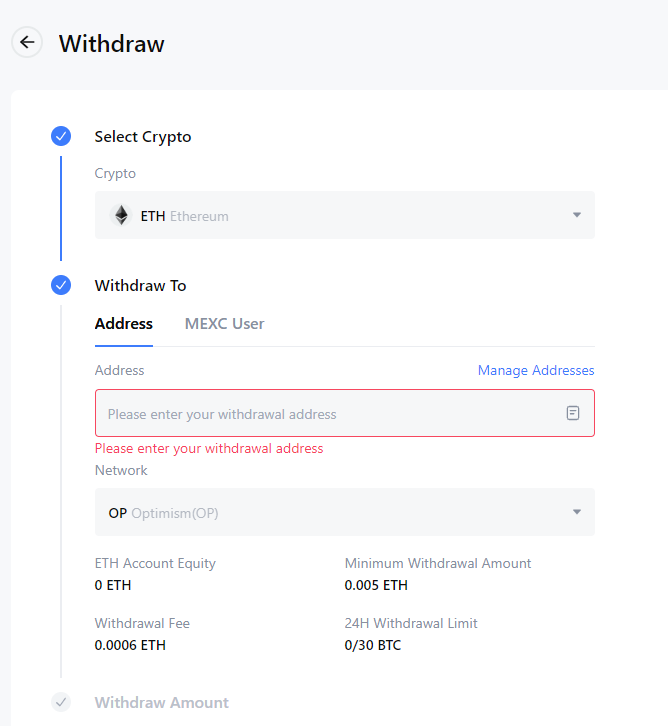
Make sure that you select the correct network and that your address matches your offline wallet address. The withdrawal fee varies from an exchange to another, so it’s always a good idea to check which centralized exchange offers you the best price. For example, if you withdraw to the base network, Coinbase offers very cheap fees.
Once your funds are received in your wallet, you can check this article for more information about bridging. It’s better to send some extra ETH to avoid having to bridge multiple times.
Completing your profile
Now that you have some ETH on your offline wallet on Zora network, you are ready to create your first collection. The first step is to connect your wallet on Zora and complete your profile:
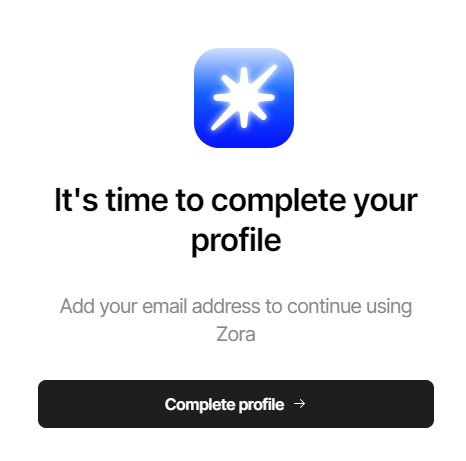
You will have to provide your email and a brief profile information.
Create your collection
Once complete, you can click on the + icon on the top right of the screen
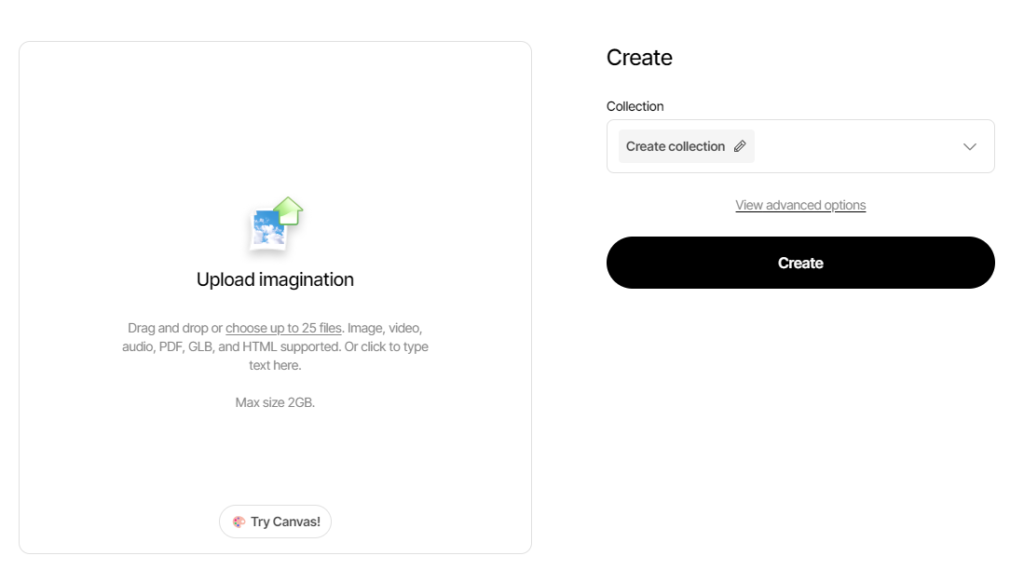
First you will have to create a collection. A collection is like a category of similar NFTs. You can create as many collection as you want and as many NFTs in each collection as you want.
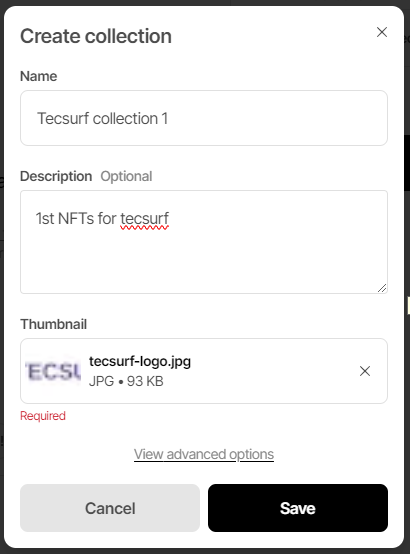
You have to select a thumbnail for your collection. Once this is completed, you can add the details for your NFT. On the left side, you upload the image for the NFT and on the right side, you specify the details.
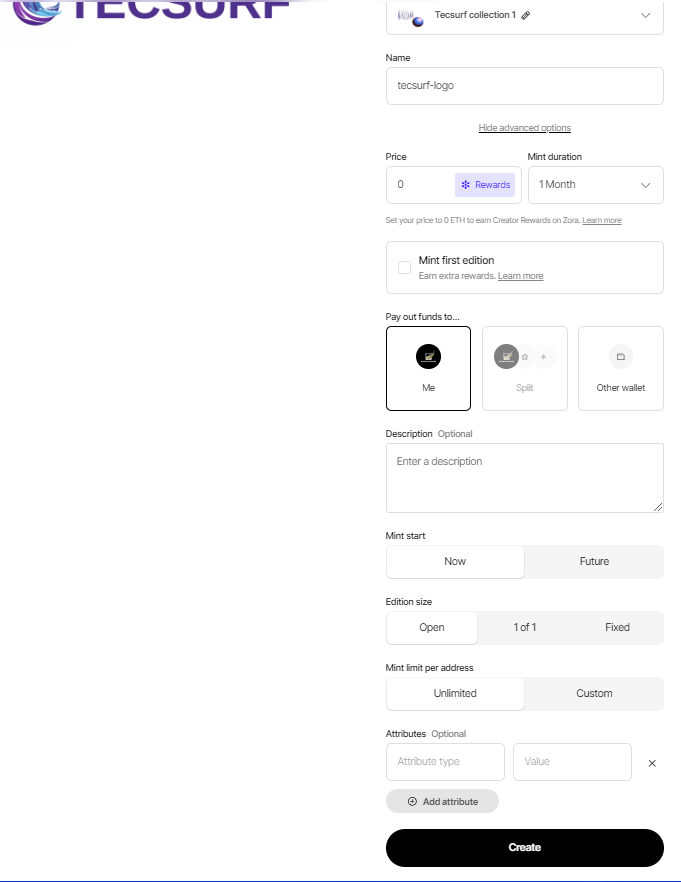
You can enter the NFT name and description, the price and the duration during which it can be minted by others. If you put 0 in the price, you will still get a portion of the minting fees from Zora, we suggest you check their reward structure.
When your NFT is created, there’s 0 NFT that exist, so you can decide to mint the 1st edition when you create your collection. Note that this will affect your creation fees, but you get to keep the 1st edition of your NFT and you can resell it later.
You can specify the edition size, meaning the total supply of your NFTs, so how many in total can be minted. You could also limit the total number of mint per address.
The attributes is a key/value pair that distinguish some “traits” of your NFT. Two similar NFTs can have different attributes that distinguish them and gives them different use cases and rarity.
You can also specify who receives the proceeds of the minting if you want to divide the proceeds with another wallet for example.
NFT creation
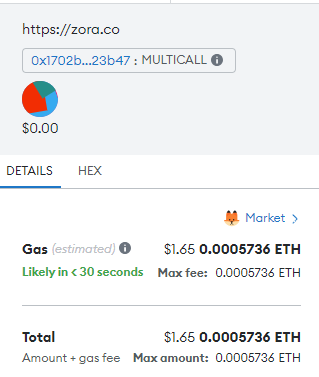
On you are ready, click on the create button and verify the transaction detail in metamask and only sign if you understand everything and approve everything. Here’s the fees with and without minting the 1st edition:

Once completed, your NFT is published on Zora and available for minting. You can share your NFT Url to invite art collectors.