If you don’t already have some Ethereum, you can buy some on a centralized exchange like Mexc and transfer them to your offline wallet.
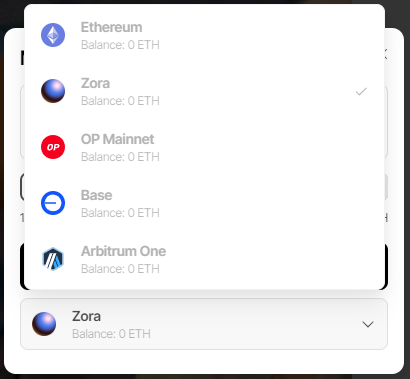
Zora supports many layer 2 chains for minting an NFT:
However, to create your collection, you have to use the Zora network. Not a lot of centralized exchanges support sending ETH directly to Zora, so what we can do is to send ETH to Arbitrum, Optimism or base and then bridge them to Zora network.
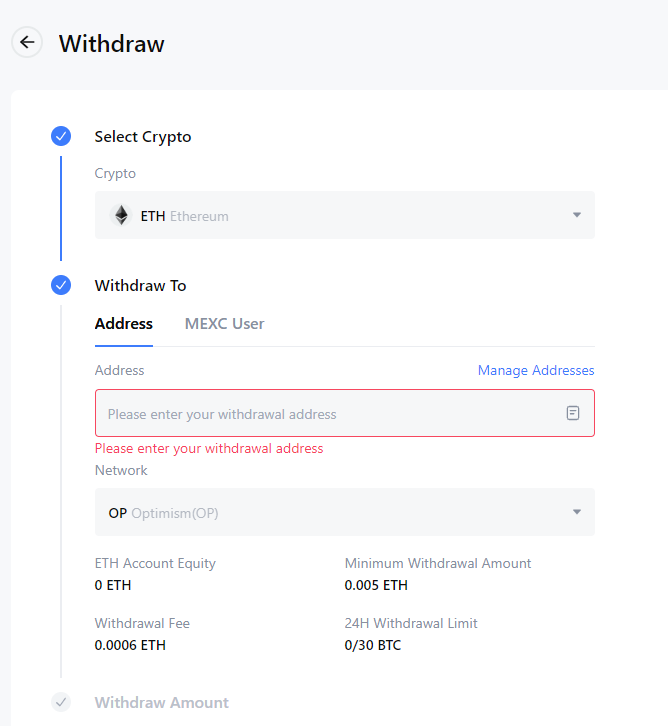
So as a first step, you withdraw funds from your centralized exchange to let’s say the Base network on your offline wallet. Here’s an example of Mexc:
Make sure that you select the correct network and that your address matches your offline wallet address. The withdrawal fee varies from an exchange to another, so it’s always a good idea to check which centralized exchange offers you the best price. For example, if you withdraw to the base network, Coinbase offers very cheap fees.
Once your funds are received in your wallet, you can check this article for more information about bridging. It’s better to send some extra ETH to avoid having to bridge multiple times.
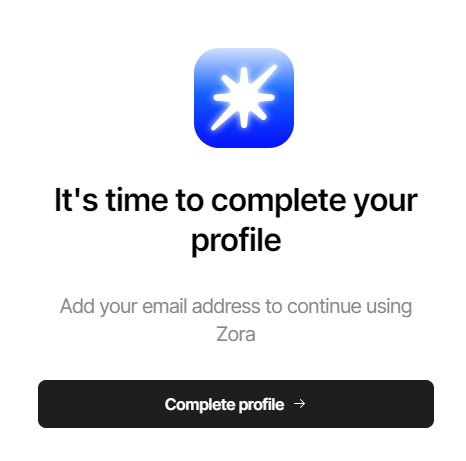
Completing your profile
Now that you have some ETH on your offline wallet on Zora network, you are ready to create your first collection. The first step is to connect your wallet on Zora and complete your profile:
You will have to provide your email and a brief profile information.
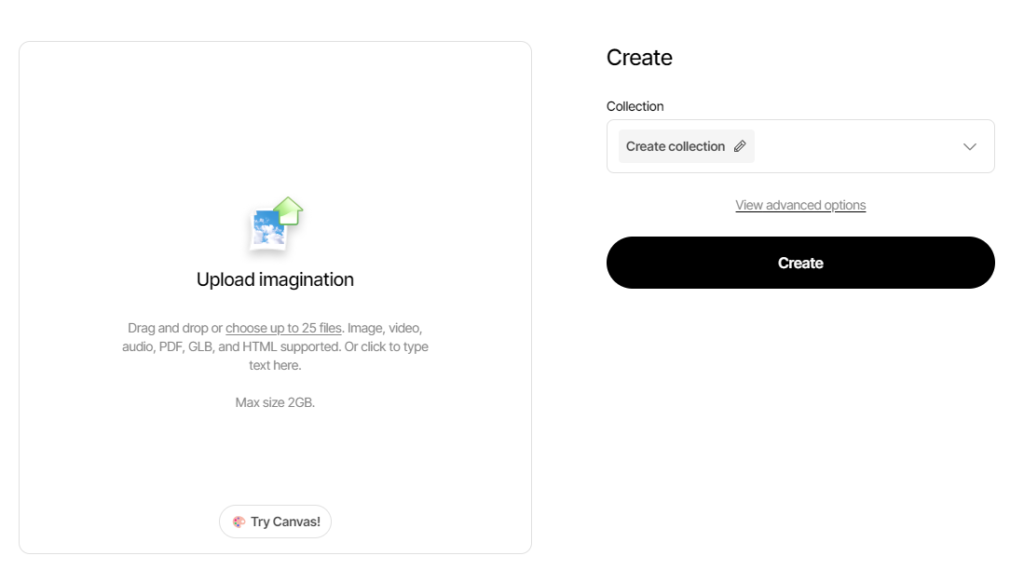
Create your collection
Once complete, you can click on the + icon on the top right of the screen
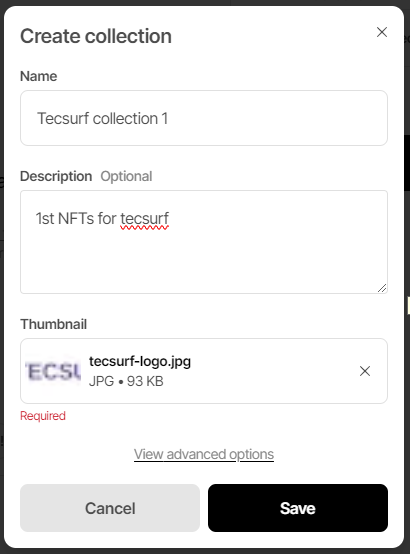
First you will have to create a collection. A collection is like a category of similar NFTs. You can create as many collection as you want and as many NFTs in each collection as you want.
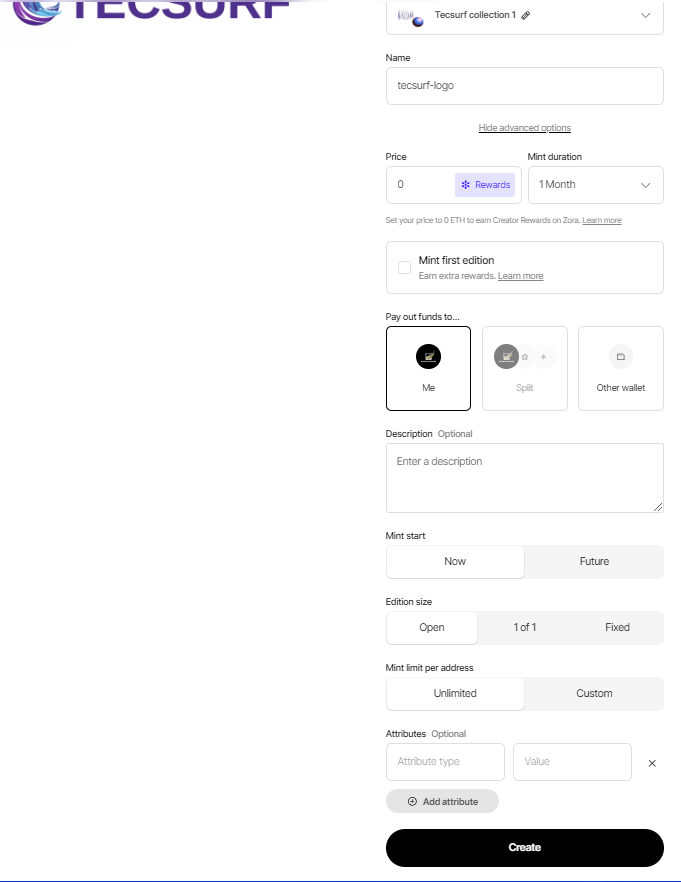
You have to select a thumbnail for your collection. Once this is completed, you can add the details for your NFT. On the left side, you upload the image for the NFT and on the right side, you specify the details.
You can enter the NFT name and description, the price and the duration during which it can be minted by others. If you put 0 in the price, you will still get a portion of the minting fees from Zora, we suggest you check their reward structure.
When your NFT is created, there’s 0 NFT that exist, so you can decide to mint the 1st edition when you create your collection. Note that this will affect your creation fees, but you get to keep the 1st edition of your NFT and you can resell it later.
You can specify the edition size, meaning the total supply of your NFTs, so how many in total can be minted. You could also limit the total number of mint per address.
The attributes is a key/value pair that distinguish some “traits” of your NFT. Two similar NFTs can have different attributes that distinguish them and gives them different use cases and rarity.
You can also specify who receives the proceeds of the minting if you want to divide the proceeds with another wallet for example.
NFT creation
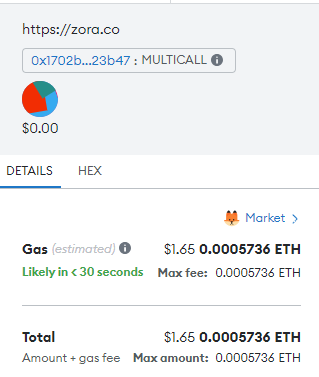
On you are ready, click on the create button and verify the transaction detail in metamask and only sign if you understand everything and approve everything. Here’s the fees with and without minting the 1st edition:
Once completed, your NFT is published on Zora and available for minting. You can share your NFT Url to invite art collectors.
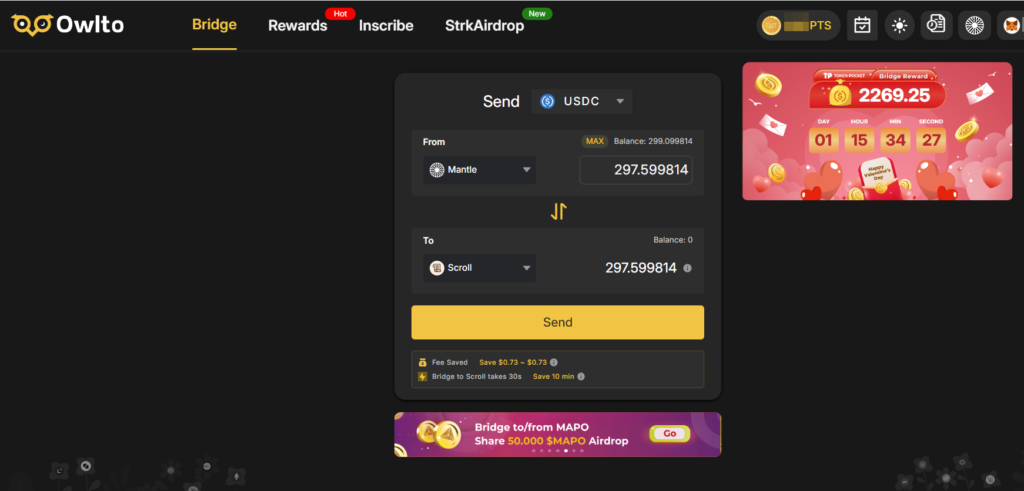
In this article we will go over the fees for bridging your assets from one L2 chain to another. We will use the owlto bridge, which is offering a discount for now.
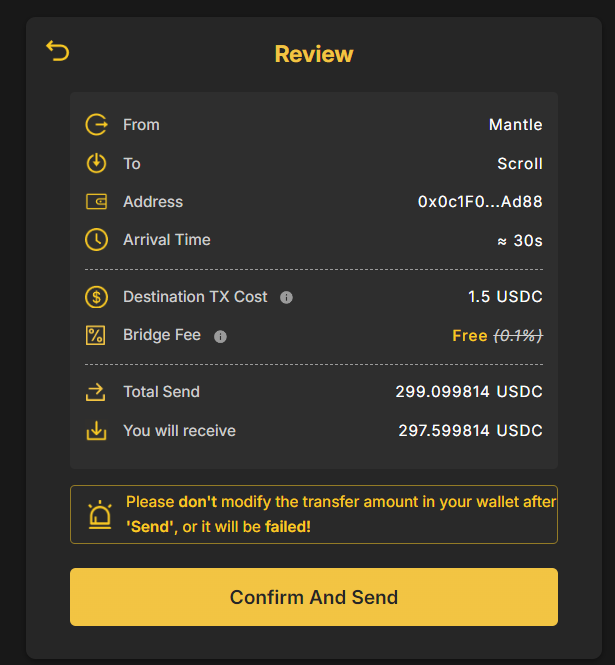
We will transfer some USDC from Mantle to Scroll networks. Using owlto is straightforward, you select the asset you want to transfer and choose the source and destination chain:
On the next step you can verify the details:
We can see that the bridge fee if free for now, but there’s a destination cost of 1.5 USDC.
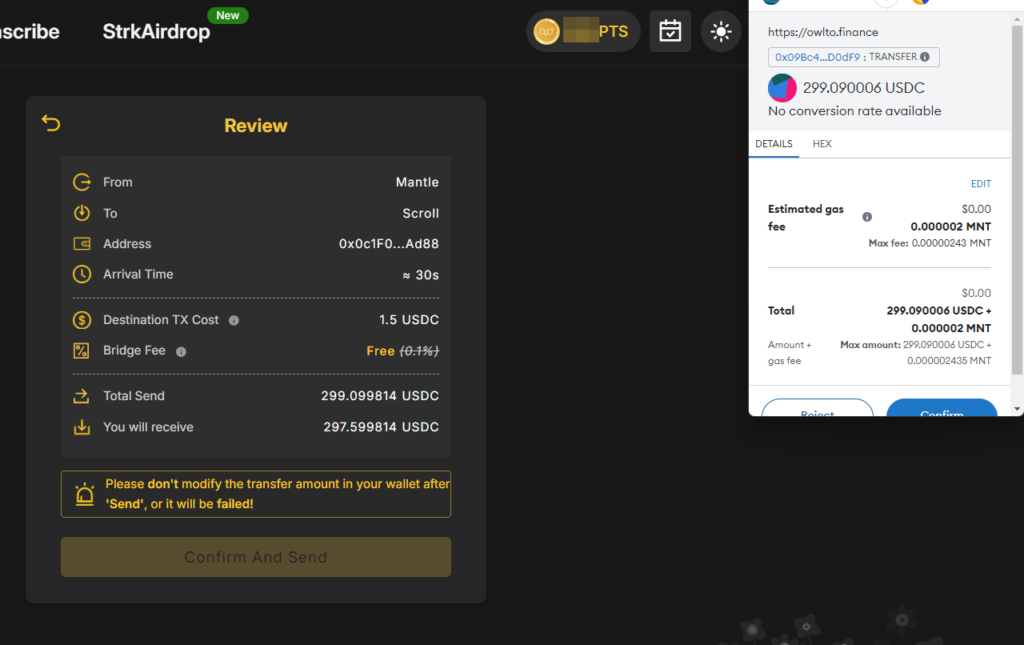
Once we Confirm and send, we have to pay the gas fees on the Mantle network in MNT:
Don’t rely on the values shown in metamask for now because the final gas fee will be much higher. Probably there’s a UI error or the real price of MNT in metamask is not accurate. Also, metamask shows the gas price on L2, but does not show the actual transaction fee.
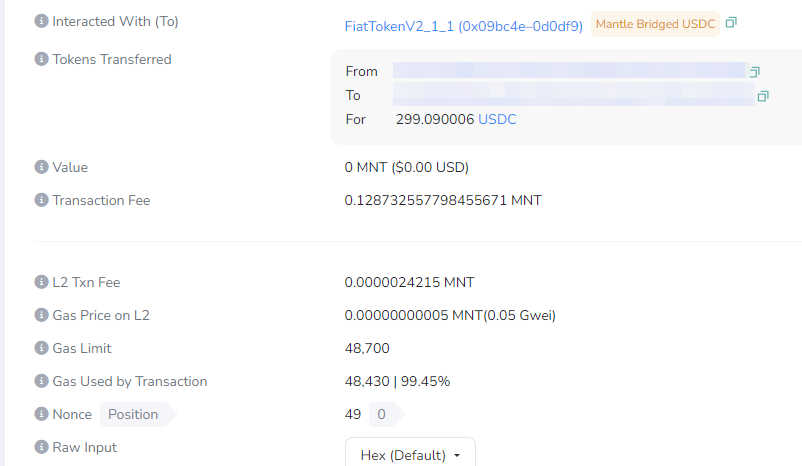
Once the transaction is complete, owlto provides us with the transaction links on the mantle scanner and scroll scanner. We can check the details over there to get the exact fees:
On Mantle:
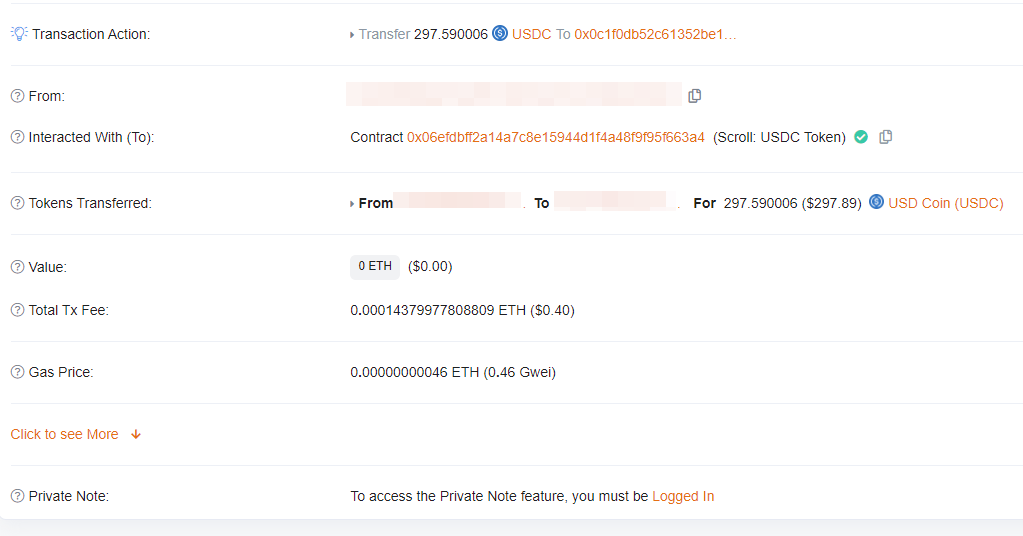
On Scroll:
So in total here’s how much it costs:
0.1287 MNT
1.5 USDC
0.0001437 ETH
At today’s price it’s around 1.99 $ in total fees. It’s acceptable for the amount transferred, but if we want to transfer a smaller amount, the fee is roughly the same, so you will have to see if it’s worth it. In the future, the platform will start charging a bridging fee so that’s something to consider too. Also we have to take notice that these fees will vary depending on each network’s congestion.
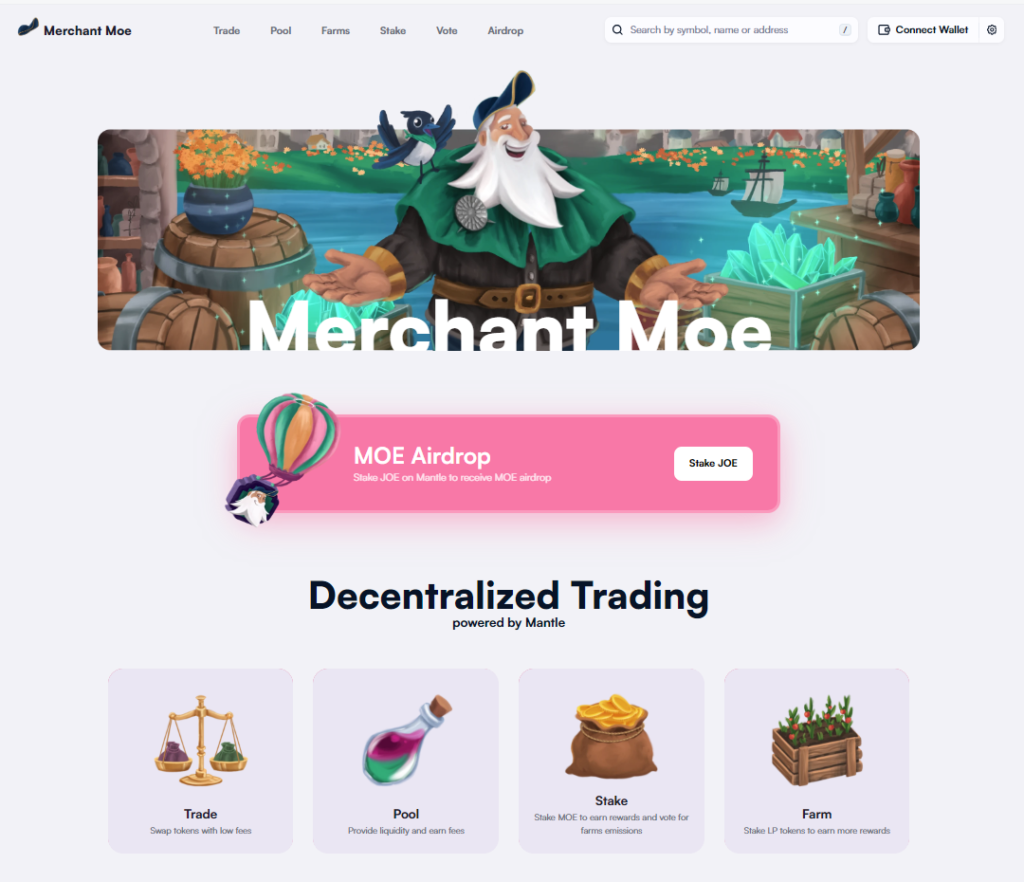
MerchantMoe is developed by the same team as TraderJoe, the popular dex on Avalanche. It has a similar UI and gives us many options between swapping, staking and farming:
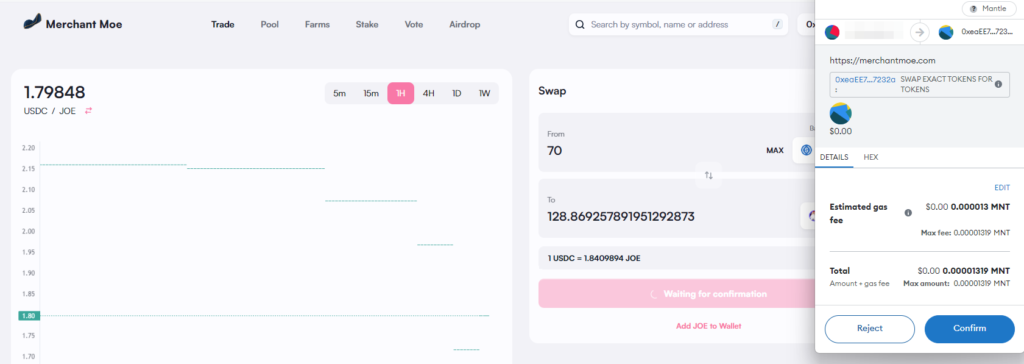
It’s very straightforward to SWAP on the platform, here’s an example of swapping USDC to JOE, the utility token of traderJOE:
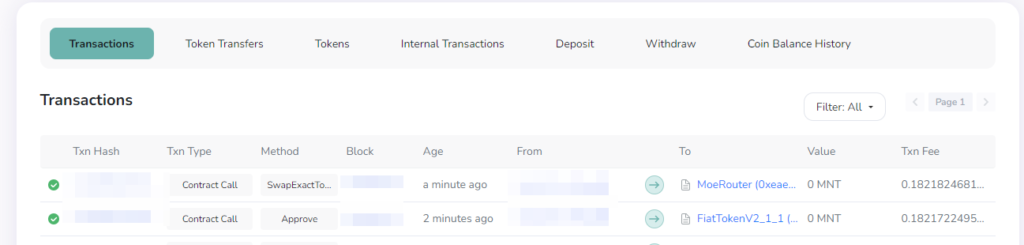
Don’t rely on the transaction fees that appear in metamask:
The fees were higher once completed. Almost 0.18 to Approve Spend and 0.18 to swap.
Moe also offers you the possibility of farming with many available pools.
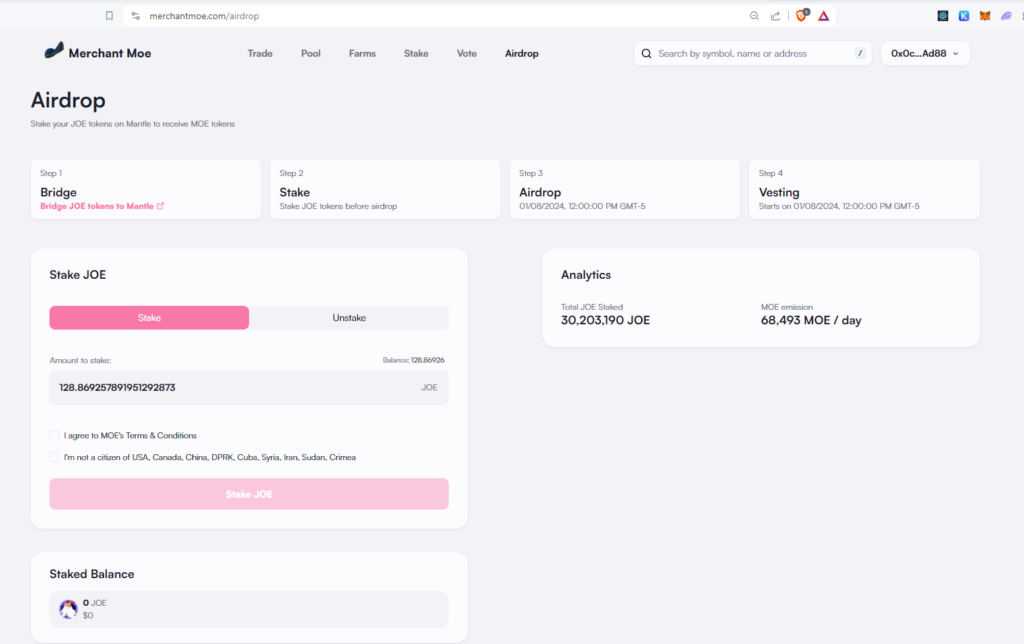
There’s also a bridge to transfer your JOE tokens between the different chains (Arbitrum, Mantle, Avalanche and BNB). However it should be expensive to use.
You can check Butter, another leading platform on Mantle.
Butter.xyz is a new decentralized exchange built on the mantle network. It offers many defi features and is currently offering points and rewards for users (for a limited time). It has an interesting and interactive way of distributing rewards such as a fishing simulation.
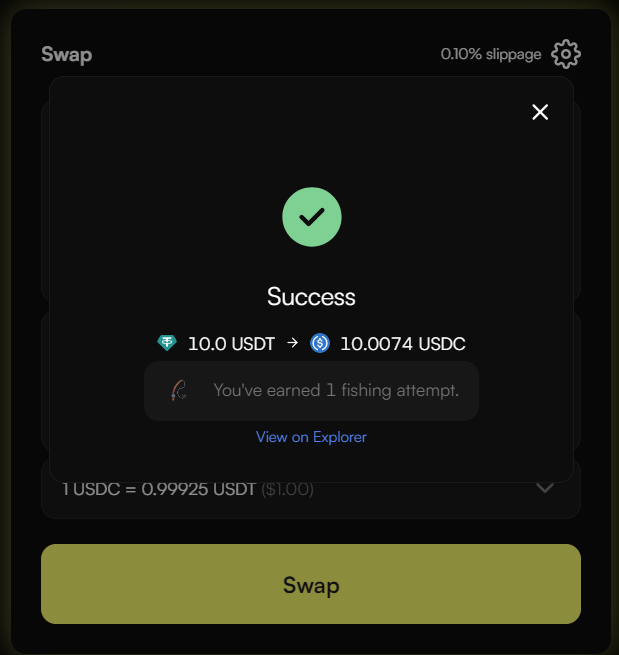
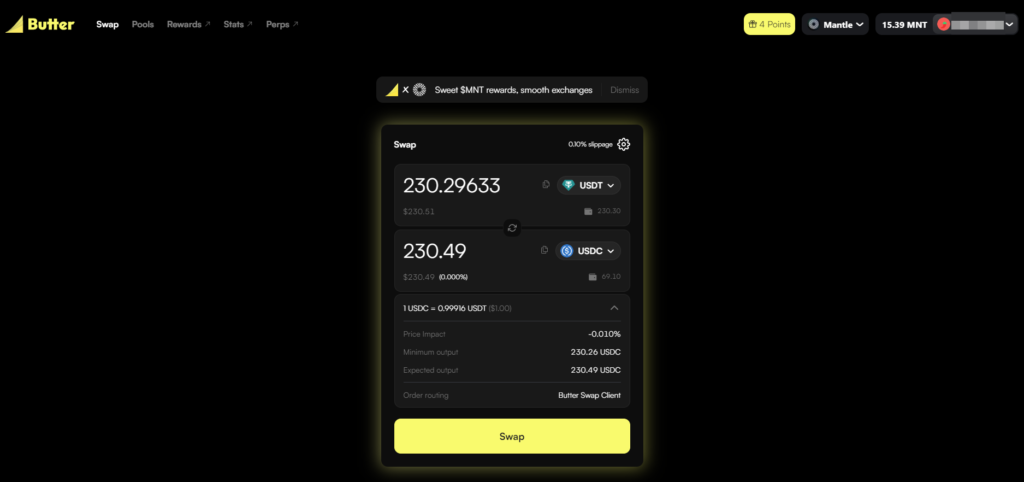
Swapping on the platform is straightforward and besides earning points, you can earn a fishing attempt:
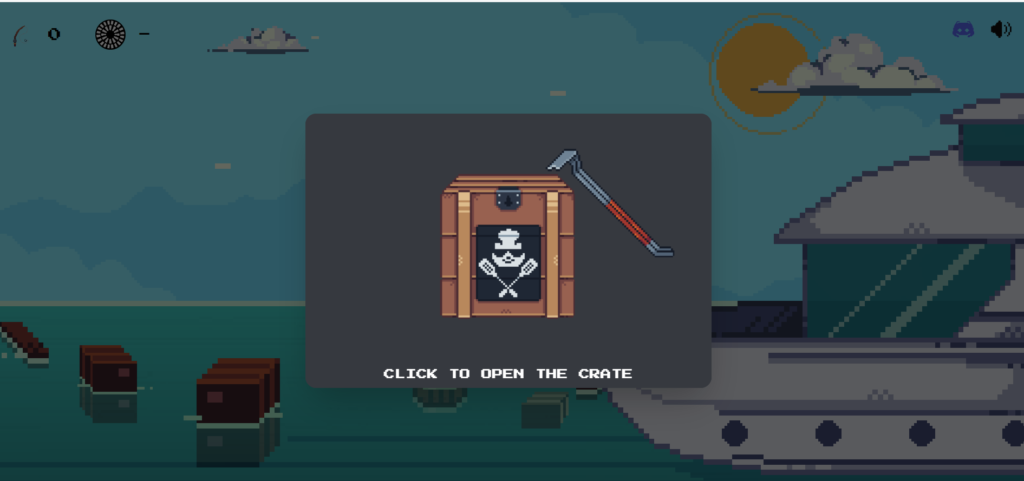
When you click on the fishing attempt, you get redirected to the animation where you can initiate the fishing attempt:
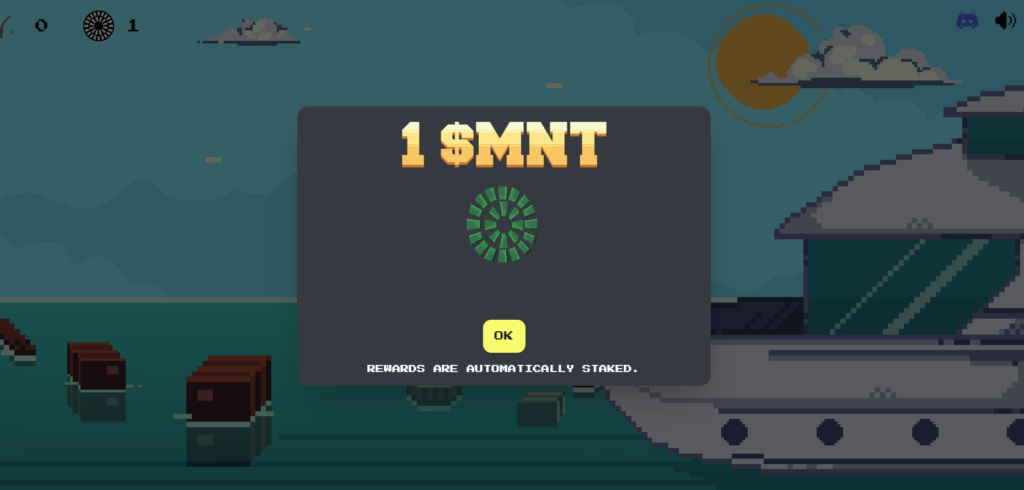
The first crate was empty but we got 1$MNT staked with the second attempt. The more swapping you do, the more fishing attempts you might obtain.
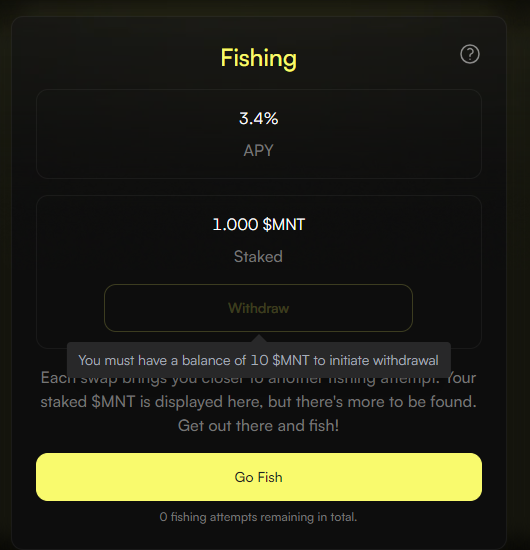
The catch is that you need at least 10 MNT to be able to unstake:
Fees
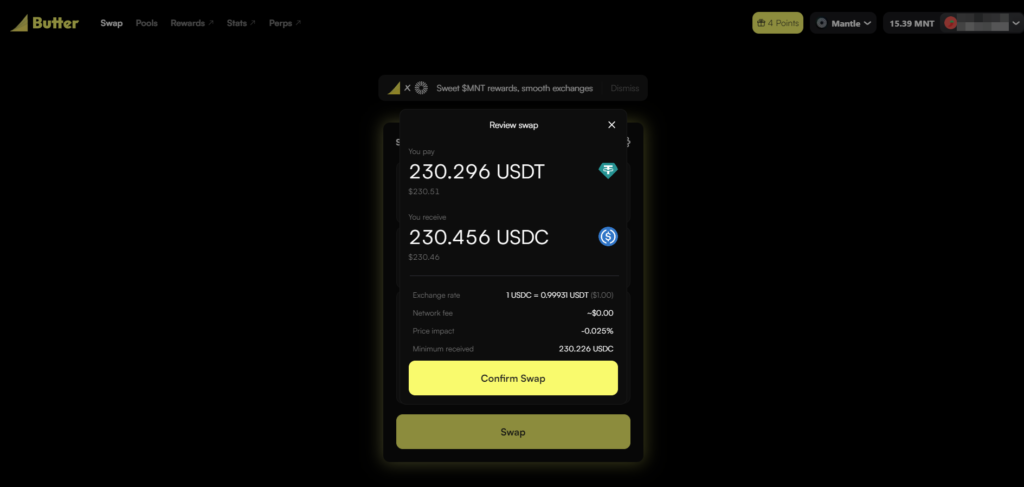
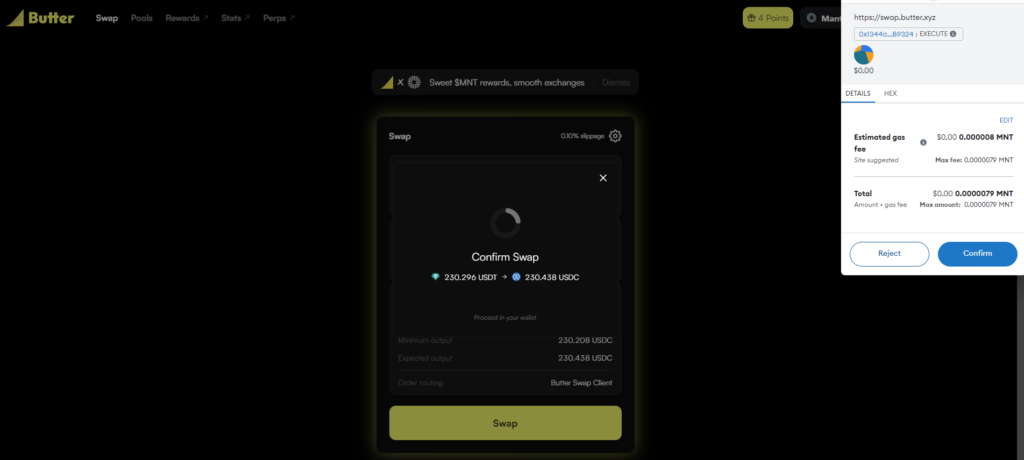
The fees of the platform are relatively low, however we noticed that the fees in the final transaction was much higher than what’s indicated in the dapp or in metamask.
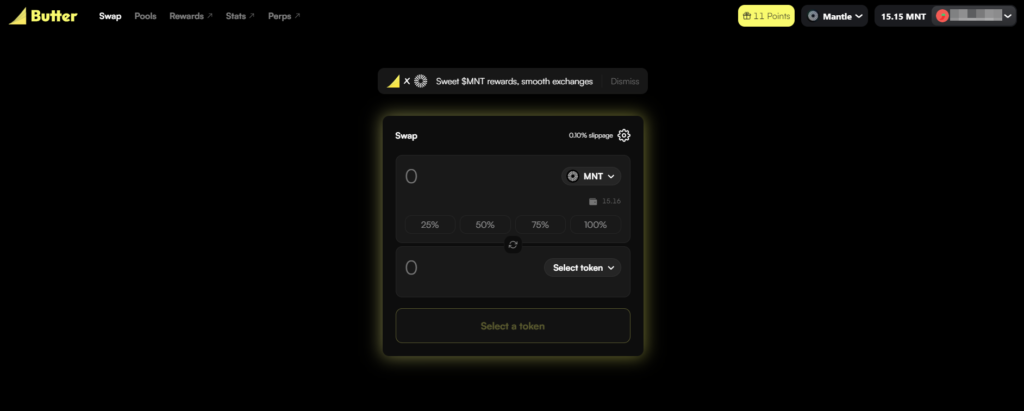
Here’s an example, we swap from USDT to USDC, our balance is 15.39 MNT and we have 4 points. In all the screens and in metamask, it shows very low fees:
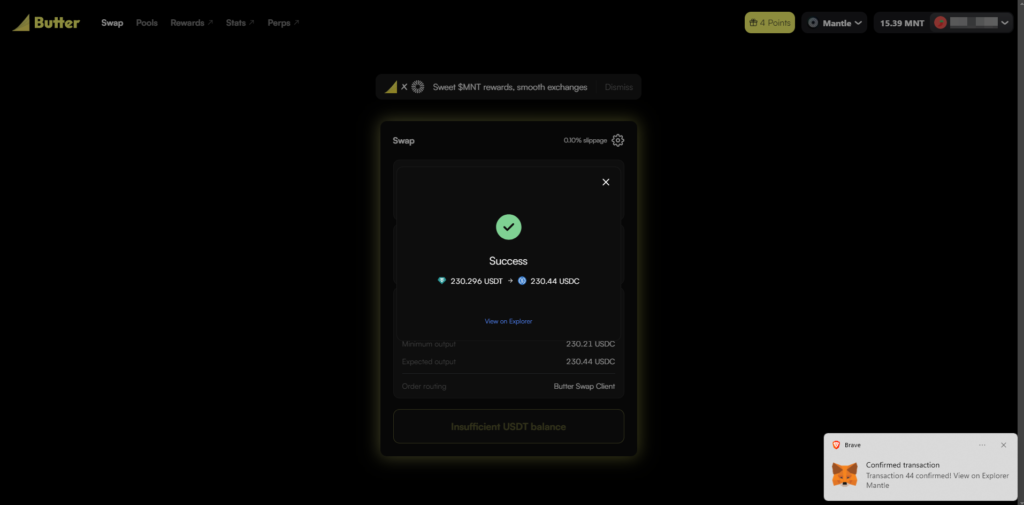
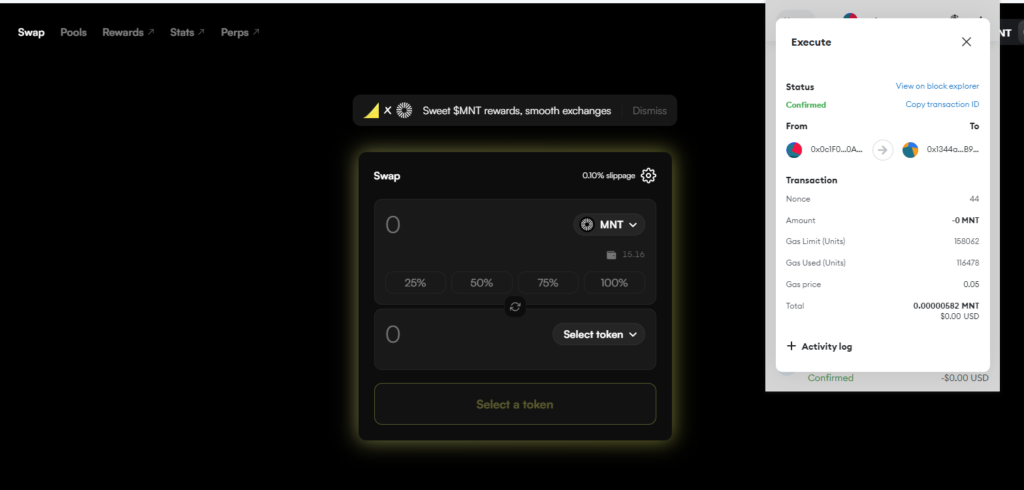
However after completion, we have 11 points and our balance is 15.15 MNT, so we used 0.24 MNT in fees. Even in metamask in the transaction history, the values are wrong.
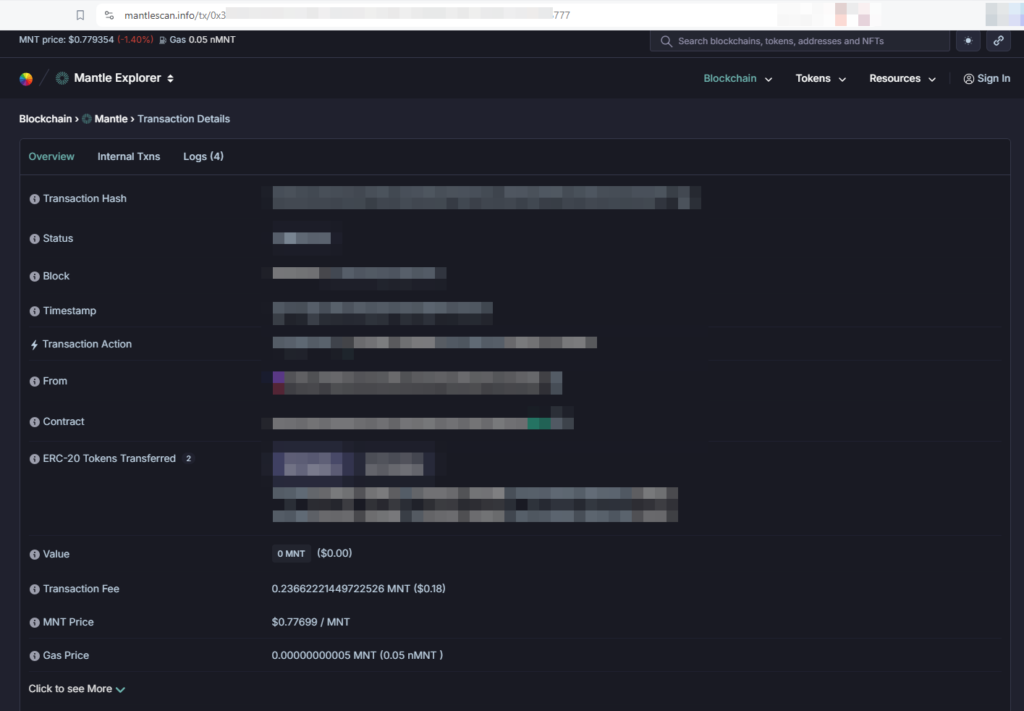
In mantle explorer it takes a lot of time for the transaction to appear, so we used another explorer where we can see that the transaction fee was in fact 0.24 . So we just believe there’s a display error somewhere or that the transaction fee estimation is not working properly.
So keep this is mind while interacting with the mantle network.
Fee optimization is a very important part of your crypto journey. Before doing a transaction, it is important to explore all possible ways and choose the strategy that minimizes the fees. This applies to on chain and off chain transactions.
Let’s say for example you want to transfer a given asset from Exchange A to Exchange B. Each exchange has a withdrawal fee, a deposit fee and sometimes a minimum amount that can be withdrawn. In some cases it could be cheaper to sell the token in one exchange for USD and buy it on the other exchange so you don’t lose your position. While this might be tempting, if there’s any capital gain, you will be imposed and pay taxes on it. So you have to be extremely careful and consult with your tax advisor before doing any alienation of assets.
Example
For the following example we suppose it’s cheaper to buy USDC on Coinbase centralized exchange than buying it on MEXC. You need your liquidity on MEXC because it offers a wider variety of coins. In this scenario, it is better to buy USDC on Coinbase and send it to MEXC. We will walk through the steps.
Receiving wallet
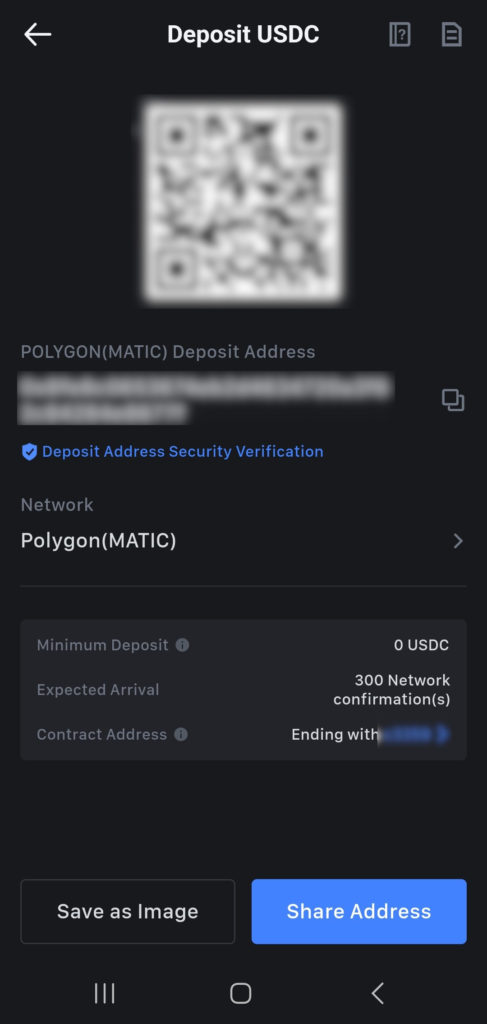
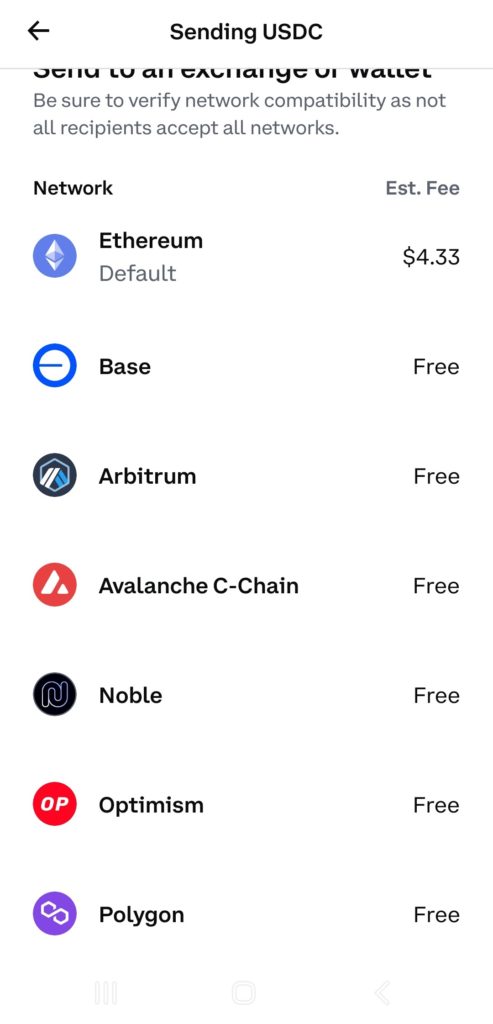
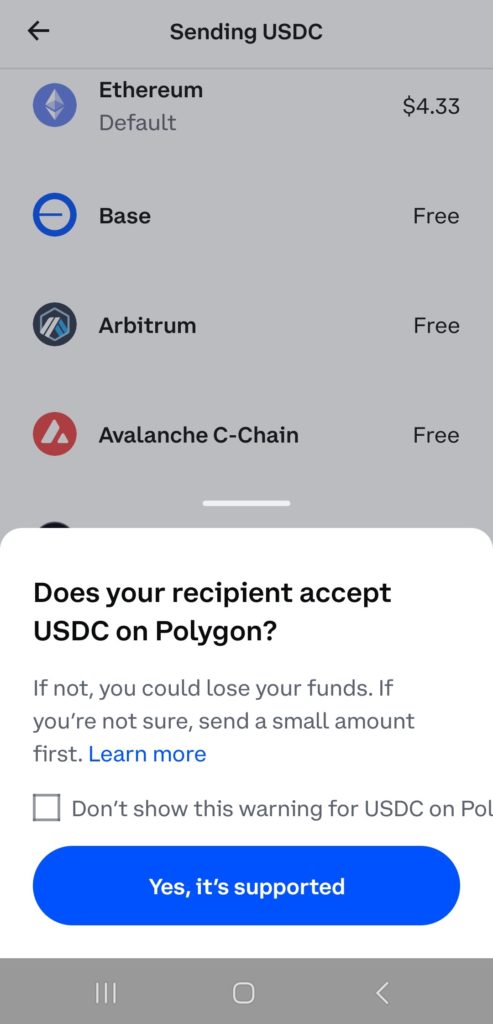
First, in your MEXC wallet, navigate to deposit and choose USDC. Then select a network that has low network fees, For example Polygon(MATIC), Once your address is ready, copy it.
Sending wallet
In your Coinbase application, navigate to your USDC account, click on send. You will be prompted to choose a network. Ethereum has the highest fee, and the rest usually have a very low fee, but as of today it is free. It’s probably a promotion from Coinbase because they encourage the usage of USDC since they are early backers of the Circle project.
Make sure you choose the same network that you selected in MEXC, double check that you are sending USDC using MATIC and enter your MEXC address.
You will receive your funds in a few minutes. In MEXC, since most crypto are paired with USDT, you can convert your USDC to USDT for a negligible fee.
Don’t forget, It is always wise to send a small amount first to make sure you receive it correctly before sending the desired amount.
To provide the best experiences, we use technologies like cookies to store and/or access device information. Consenting to these technologies will allow us to process data such as browsing behaviour or unique IDs on this site. Not consenting or withdrawing consent, may adversely affect certain features and functions.
Functional
Always active
The technical storage or access is strictly necessary for the legitimate purpose of enabling the use of a specific service explicitly requested by the subscriber or user, or for the sole purpose of carrying out the transmission of a communication over an electronic communications network.
Preferences
The technical storage or access is necessary for the legitimate purpose of storing preferences that are not requested by the subscriber or user.
Statistics
The technical storage or access that is used exclusively for statistical purposes.The technical storage or access that is used exclusively for anonymous statistical purposes. Without a subpoena, voluntary compliance on the part of your Internet Service Provider, or additional records from a third party, information stored or retrieved for this purpose alone cannot usually be used to identify you.
Marketing
The technical storage or access is required to create user profiles to send advertising, or to track the user on a website or across several websites for similar marketing purposes.